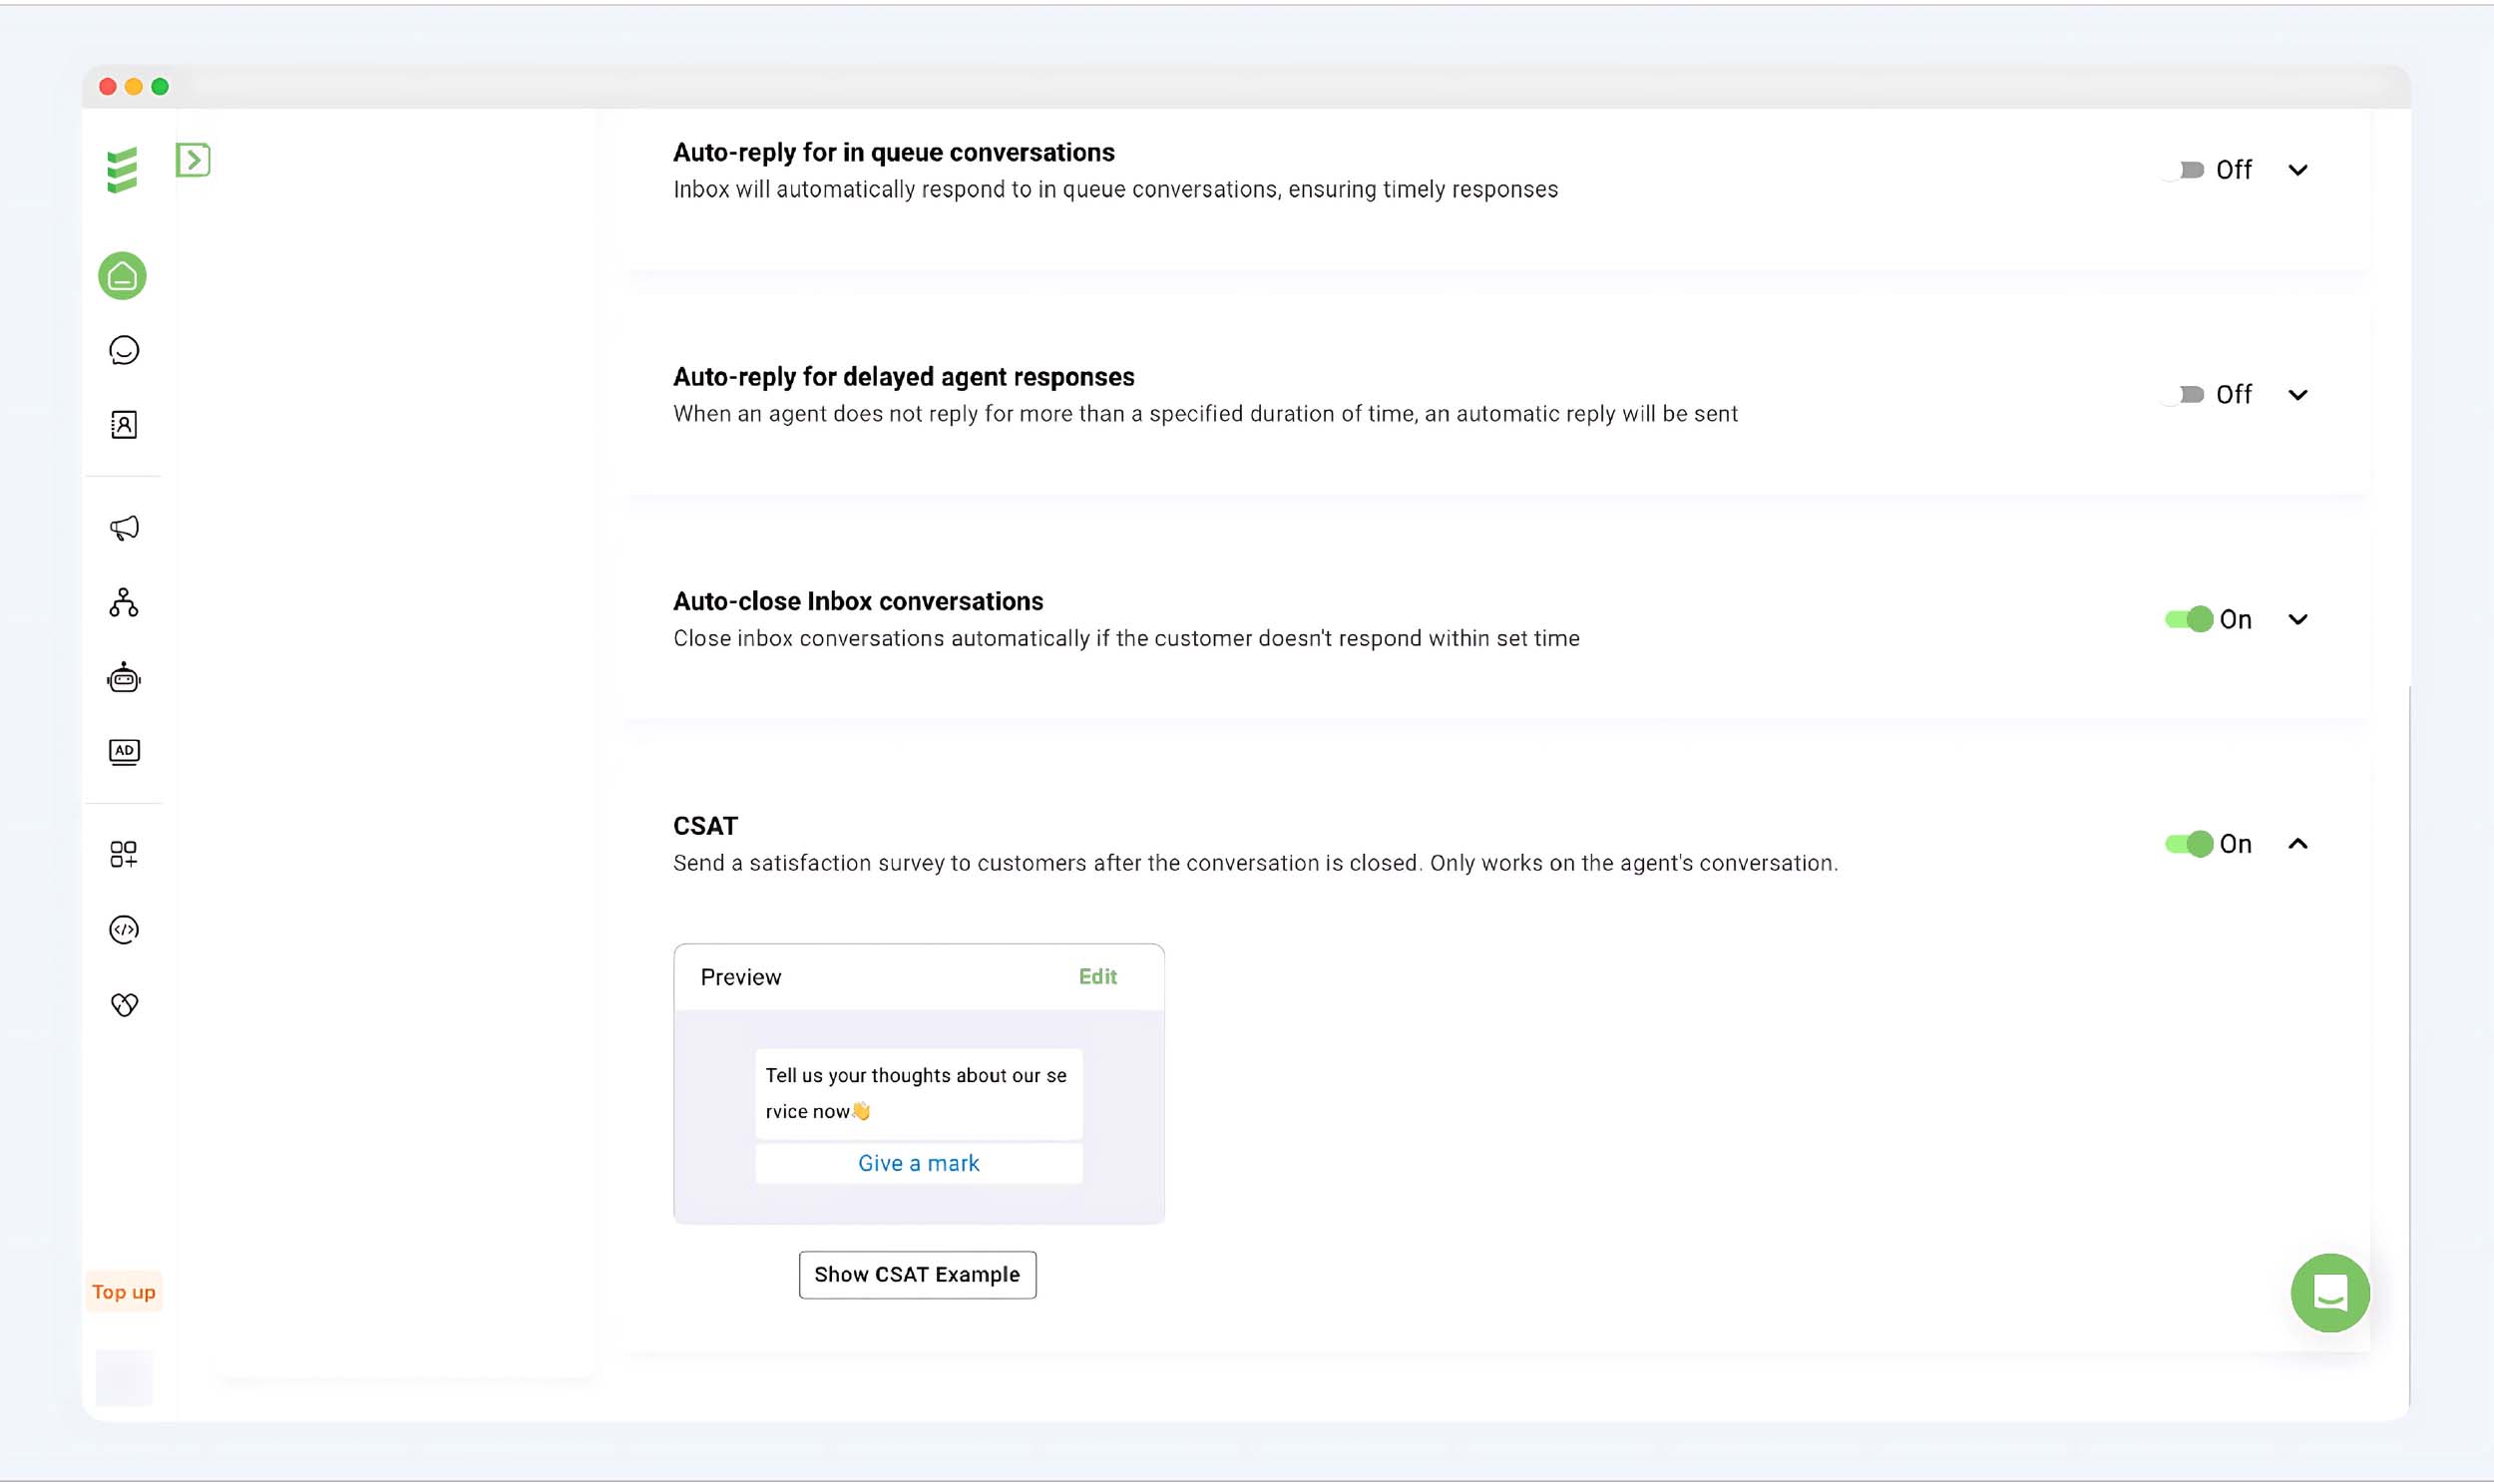
Automation
Automation is the configuration for phone numbers, including:
-
Welcome message
-
Ice breaker
-
Auto-reply for unassigned conversation
-
Auto-reply for in queue conversations
-
Auto-reply for delayed agent responses
-
Auto-close Inbox conversations
-
CSAT
Automation settings guidance:
Home > WhatsApp accounts > Number's Settings > Automation
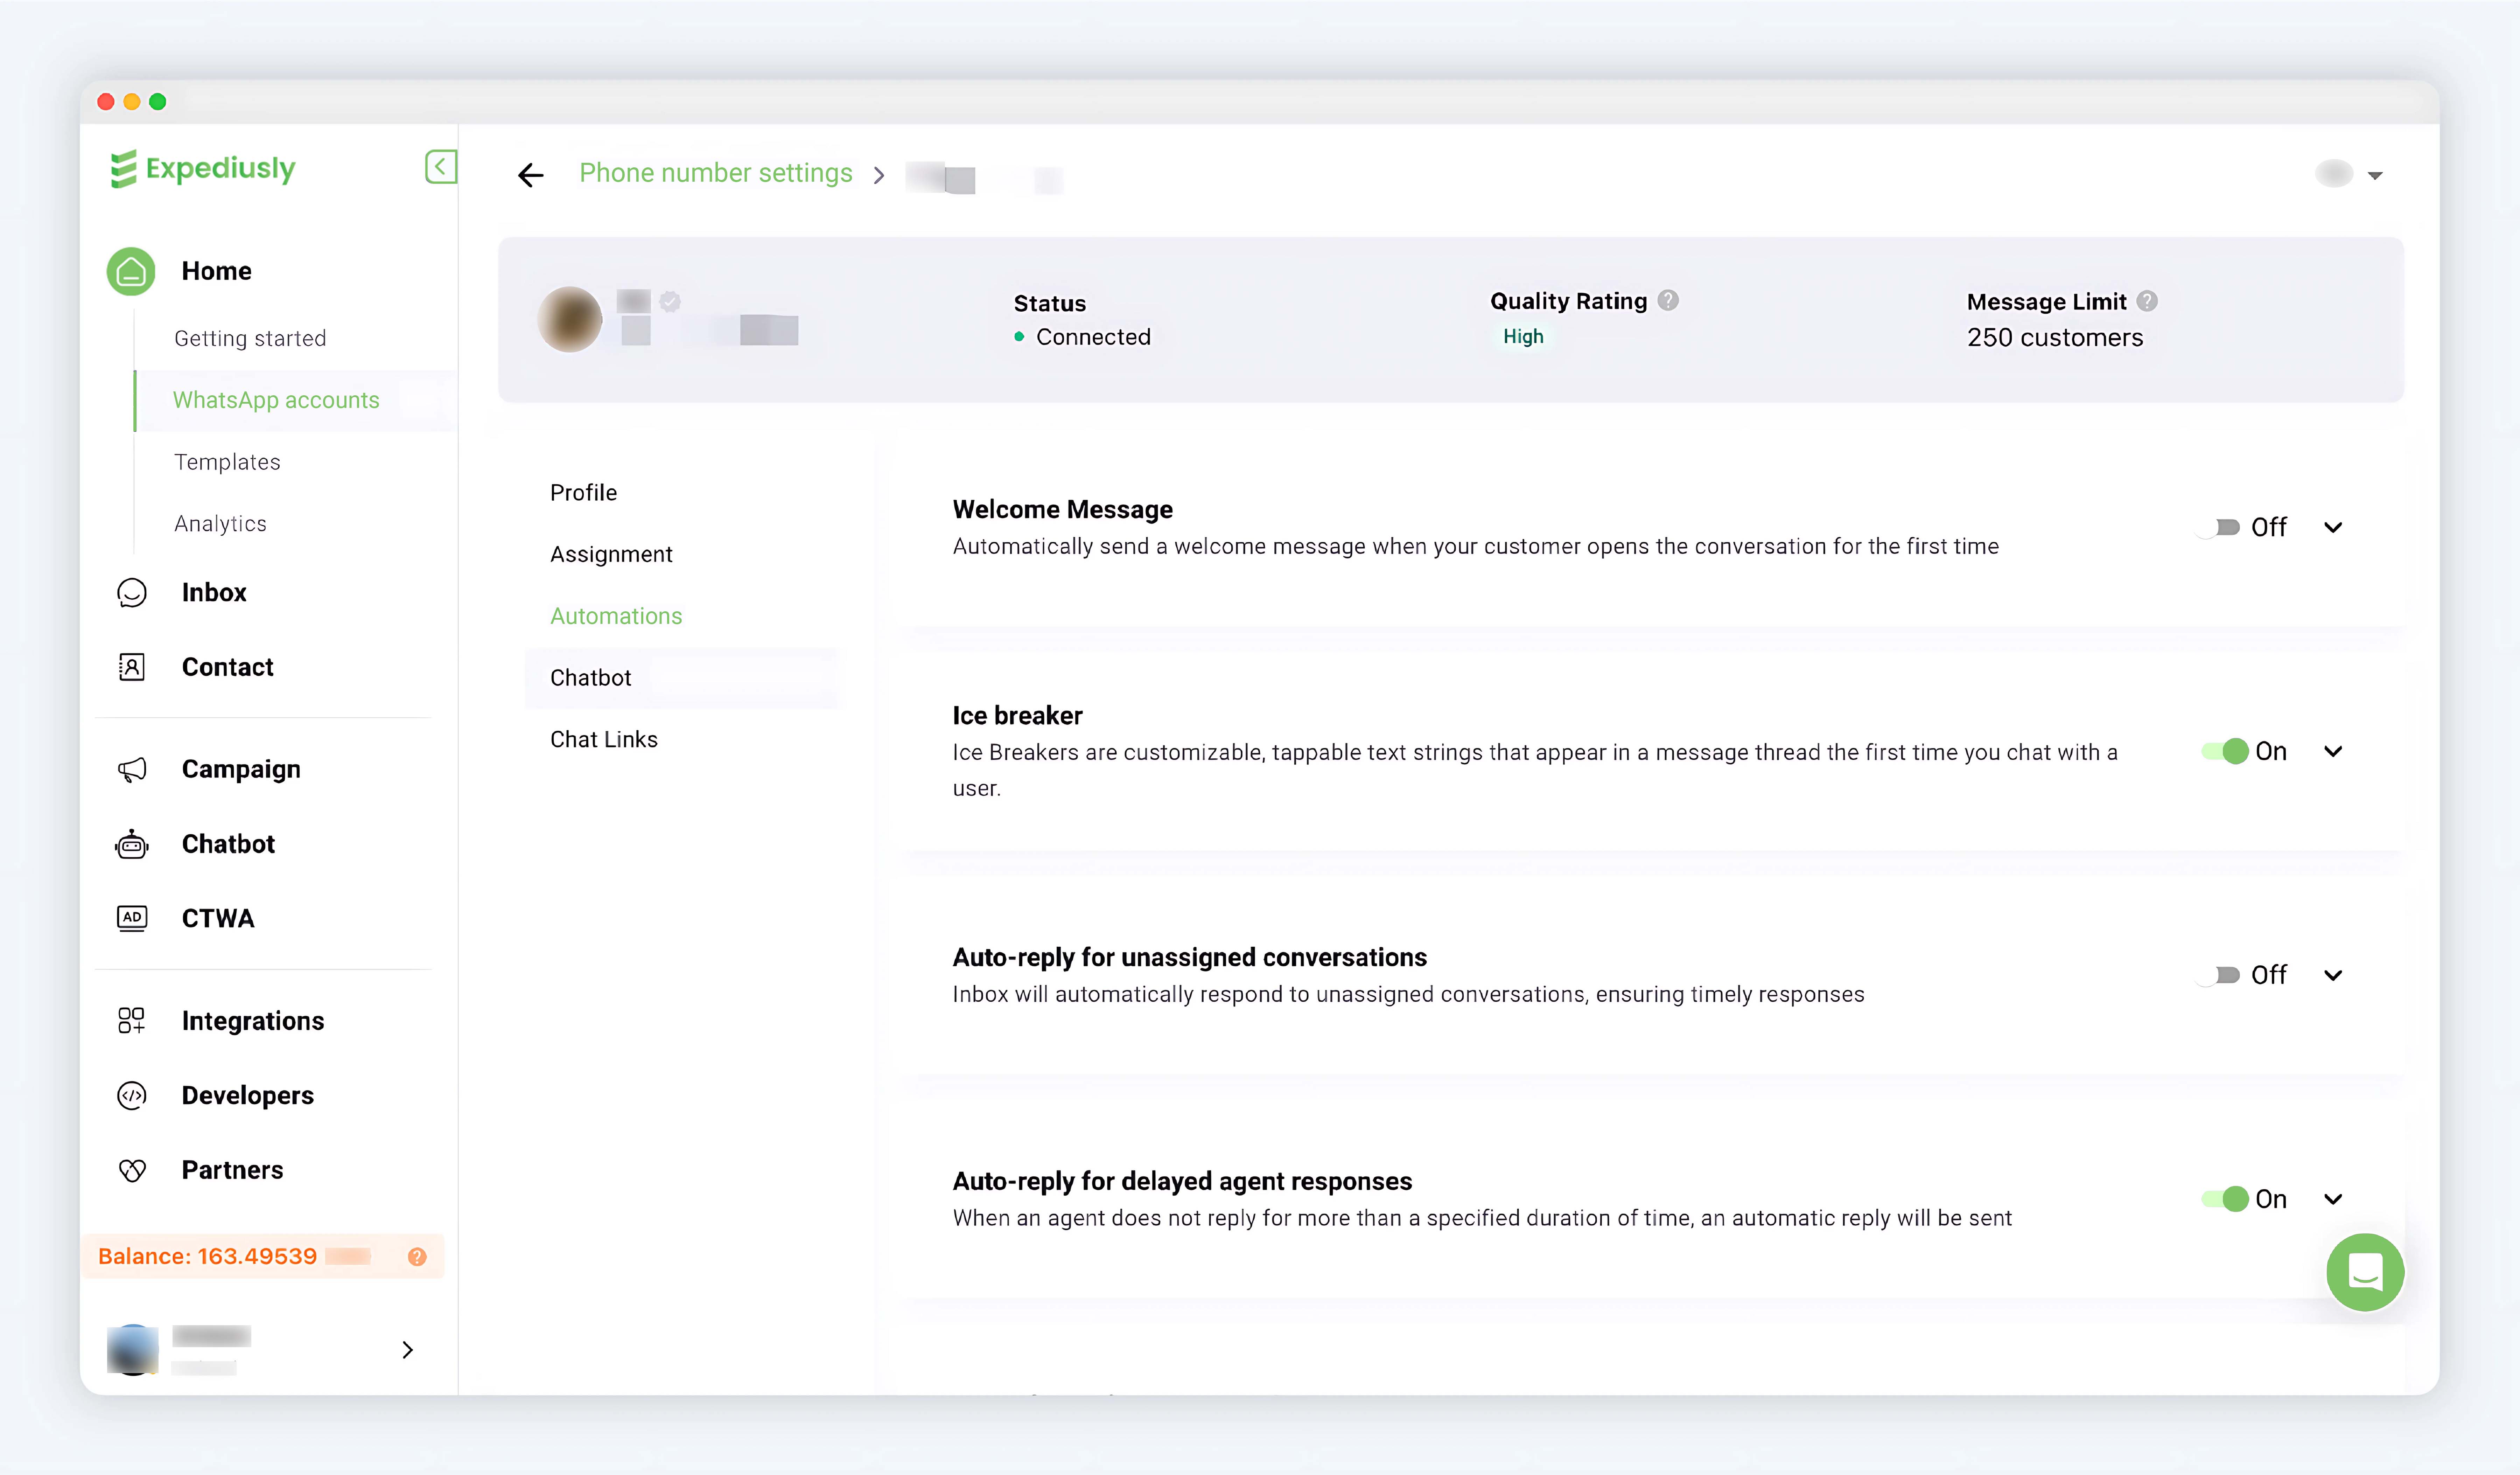
Automations
Welcome message
Timing of sending: Whenever a WhatsApp user first opens a chat window with you.
Note: It is triggered when the customer first opens a chat window with you, even before they send any message to you.
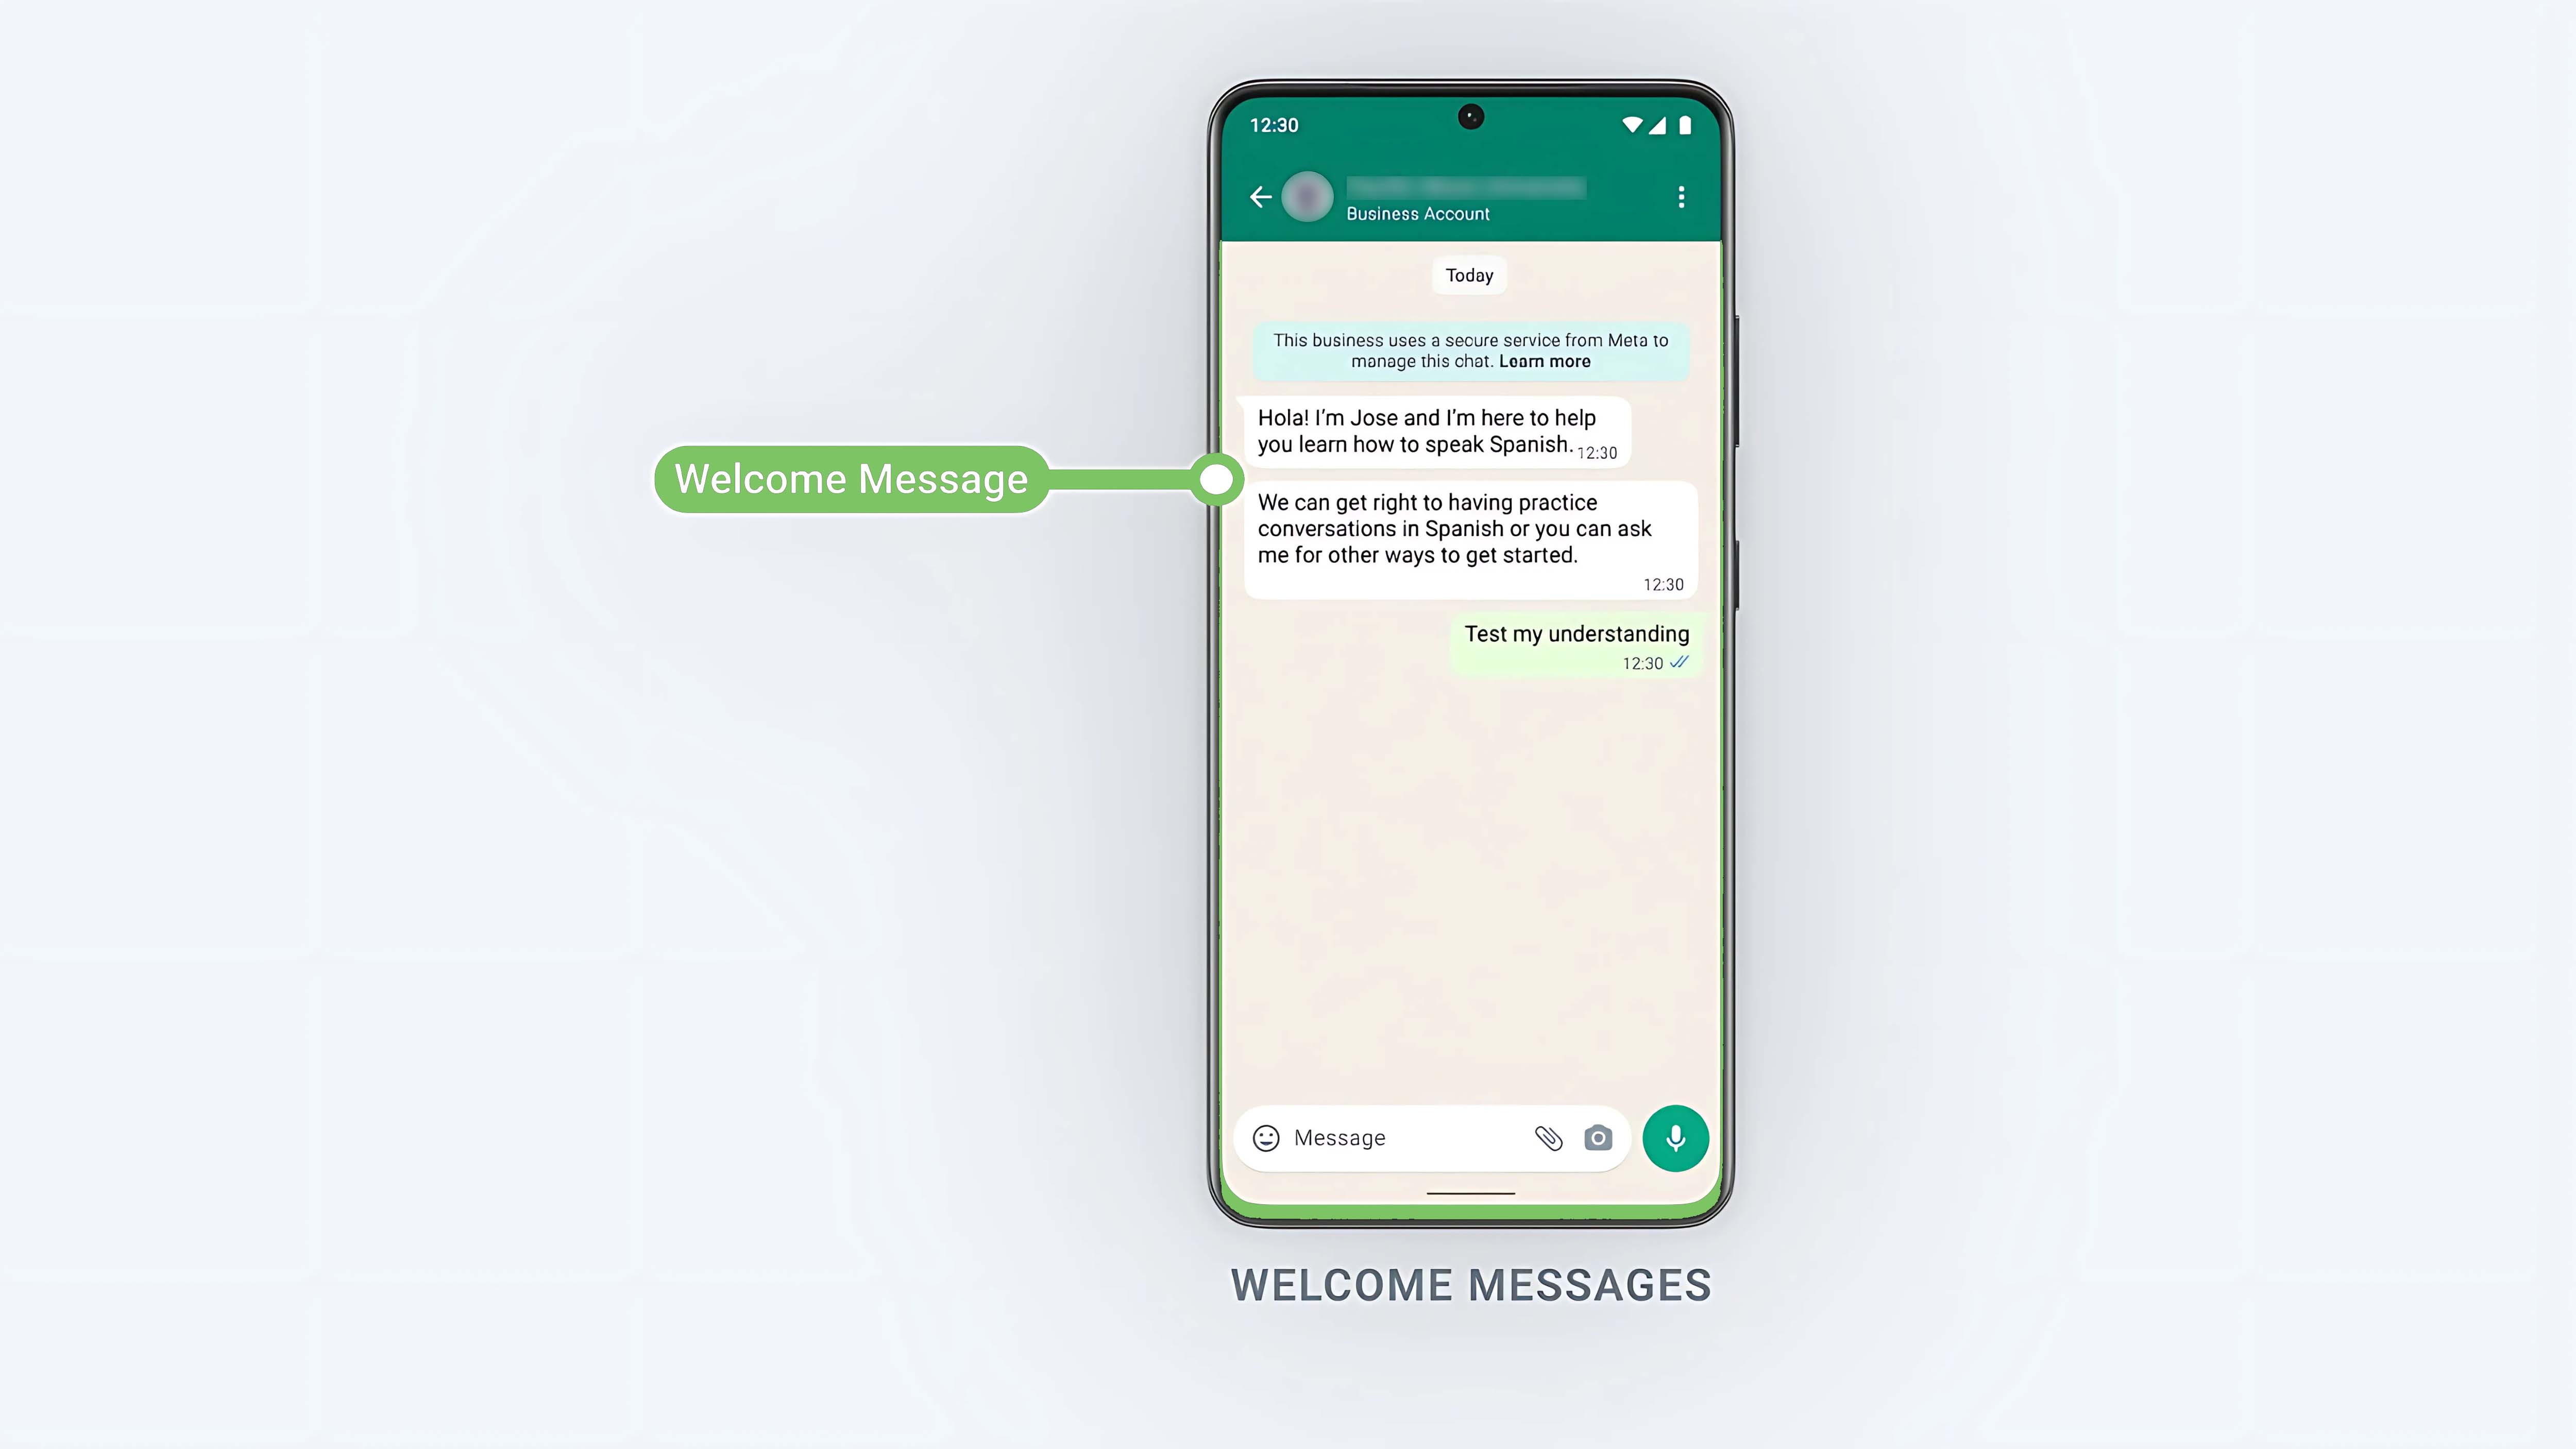
Message format: Welcome messages can be sent in free-form: text, media, interactive messages with buttons. For example: Media message, see the example below:
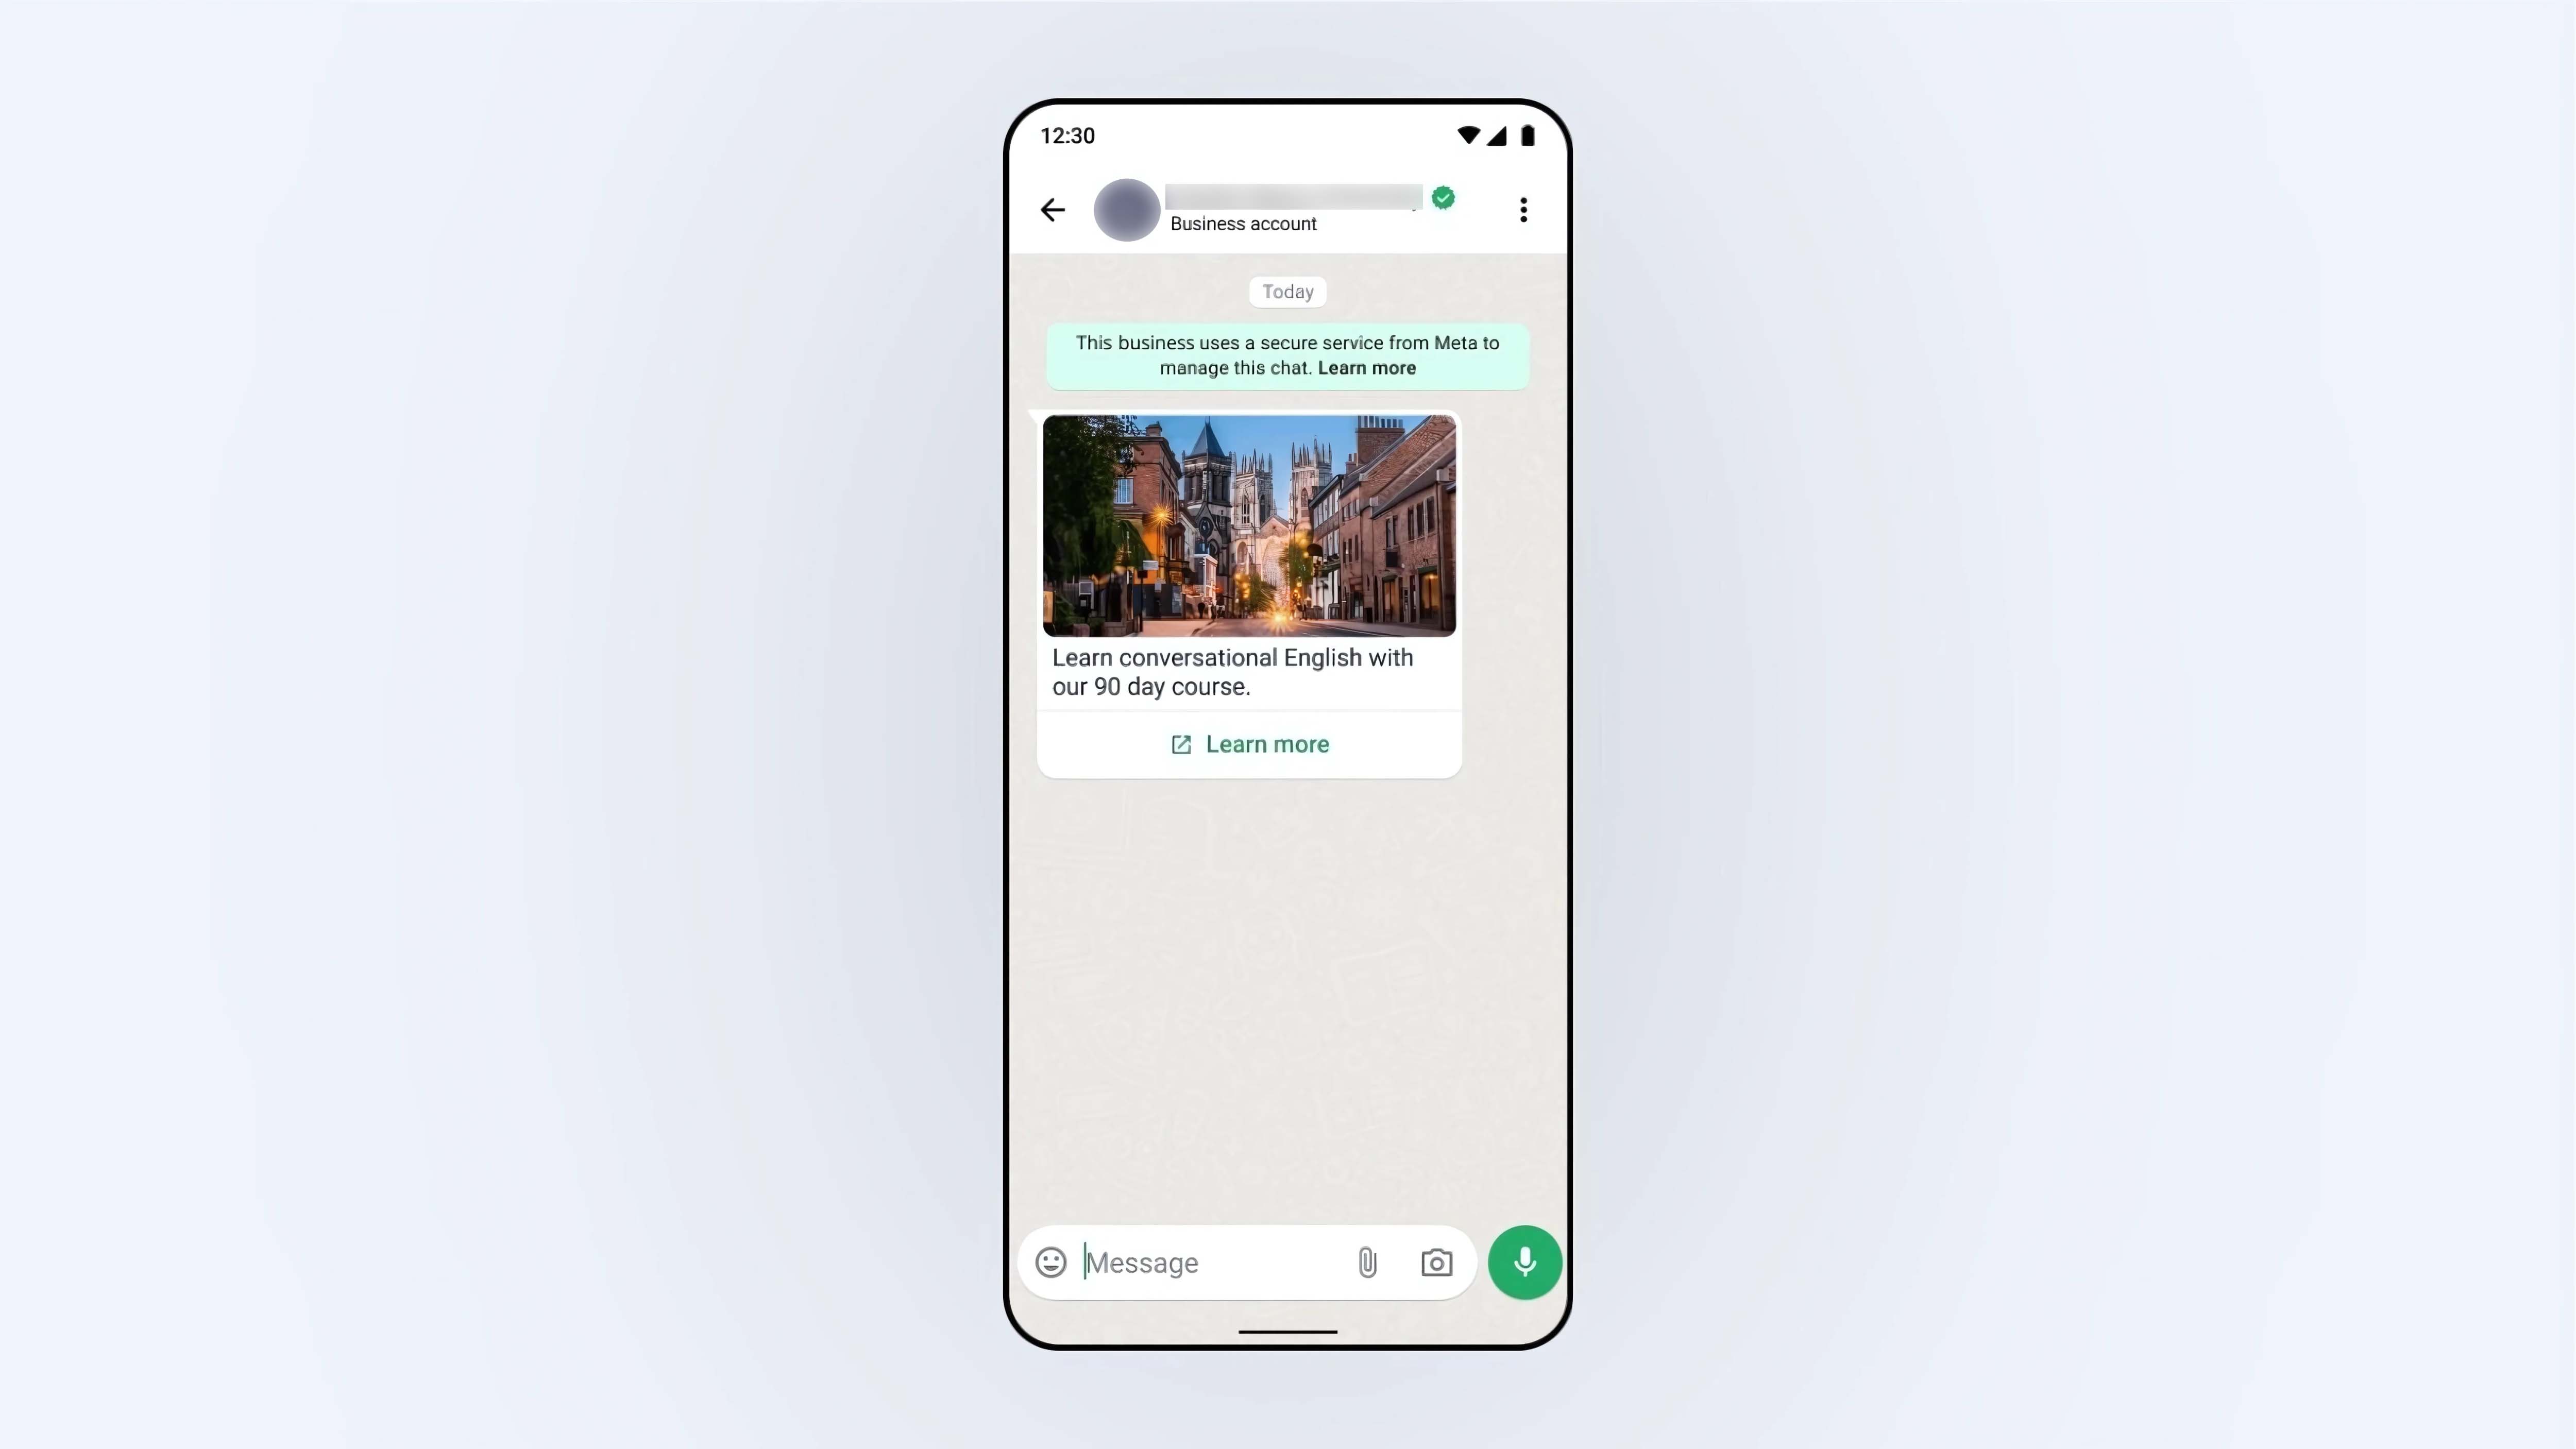
Use case: Welcome messages are great for service interactions, such as customer support. For example, you can embed a WhatsApp button on your app or website. When a user clicks on the button, they are directed to WhatsApp, where they will receive a welcome message providing context on how to interact with you.
Charges: Although welcome messages are proactively sent by the business, the messages sent will be charged as service conversation type.
Steps
Step 1: Enable the welcome message switch
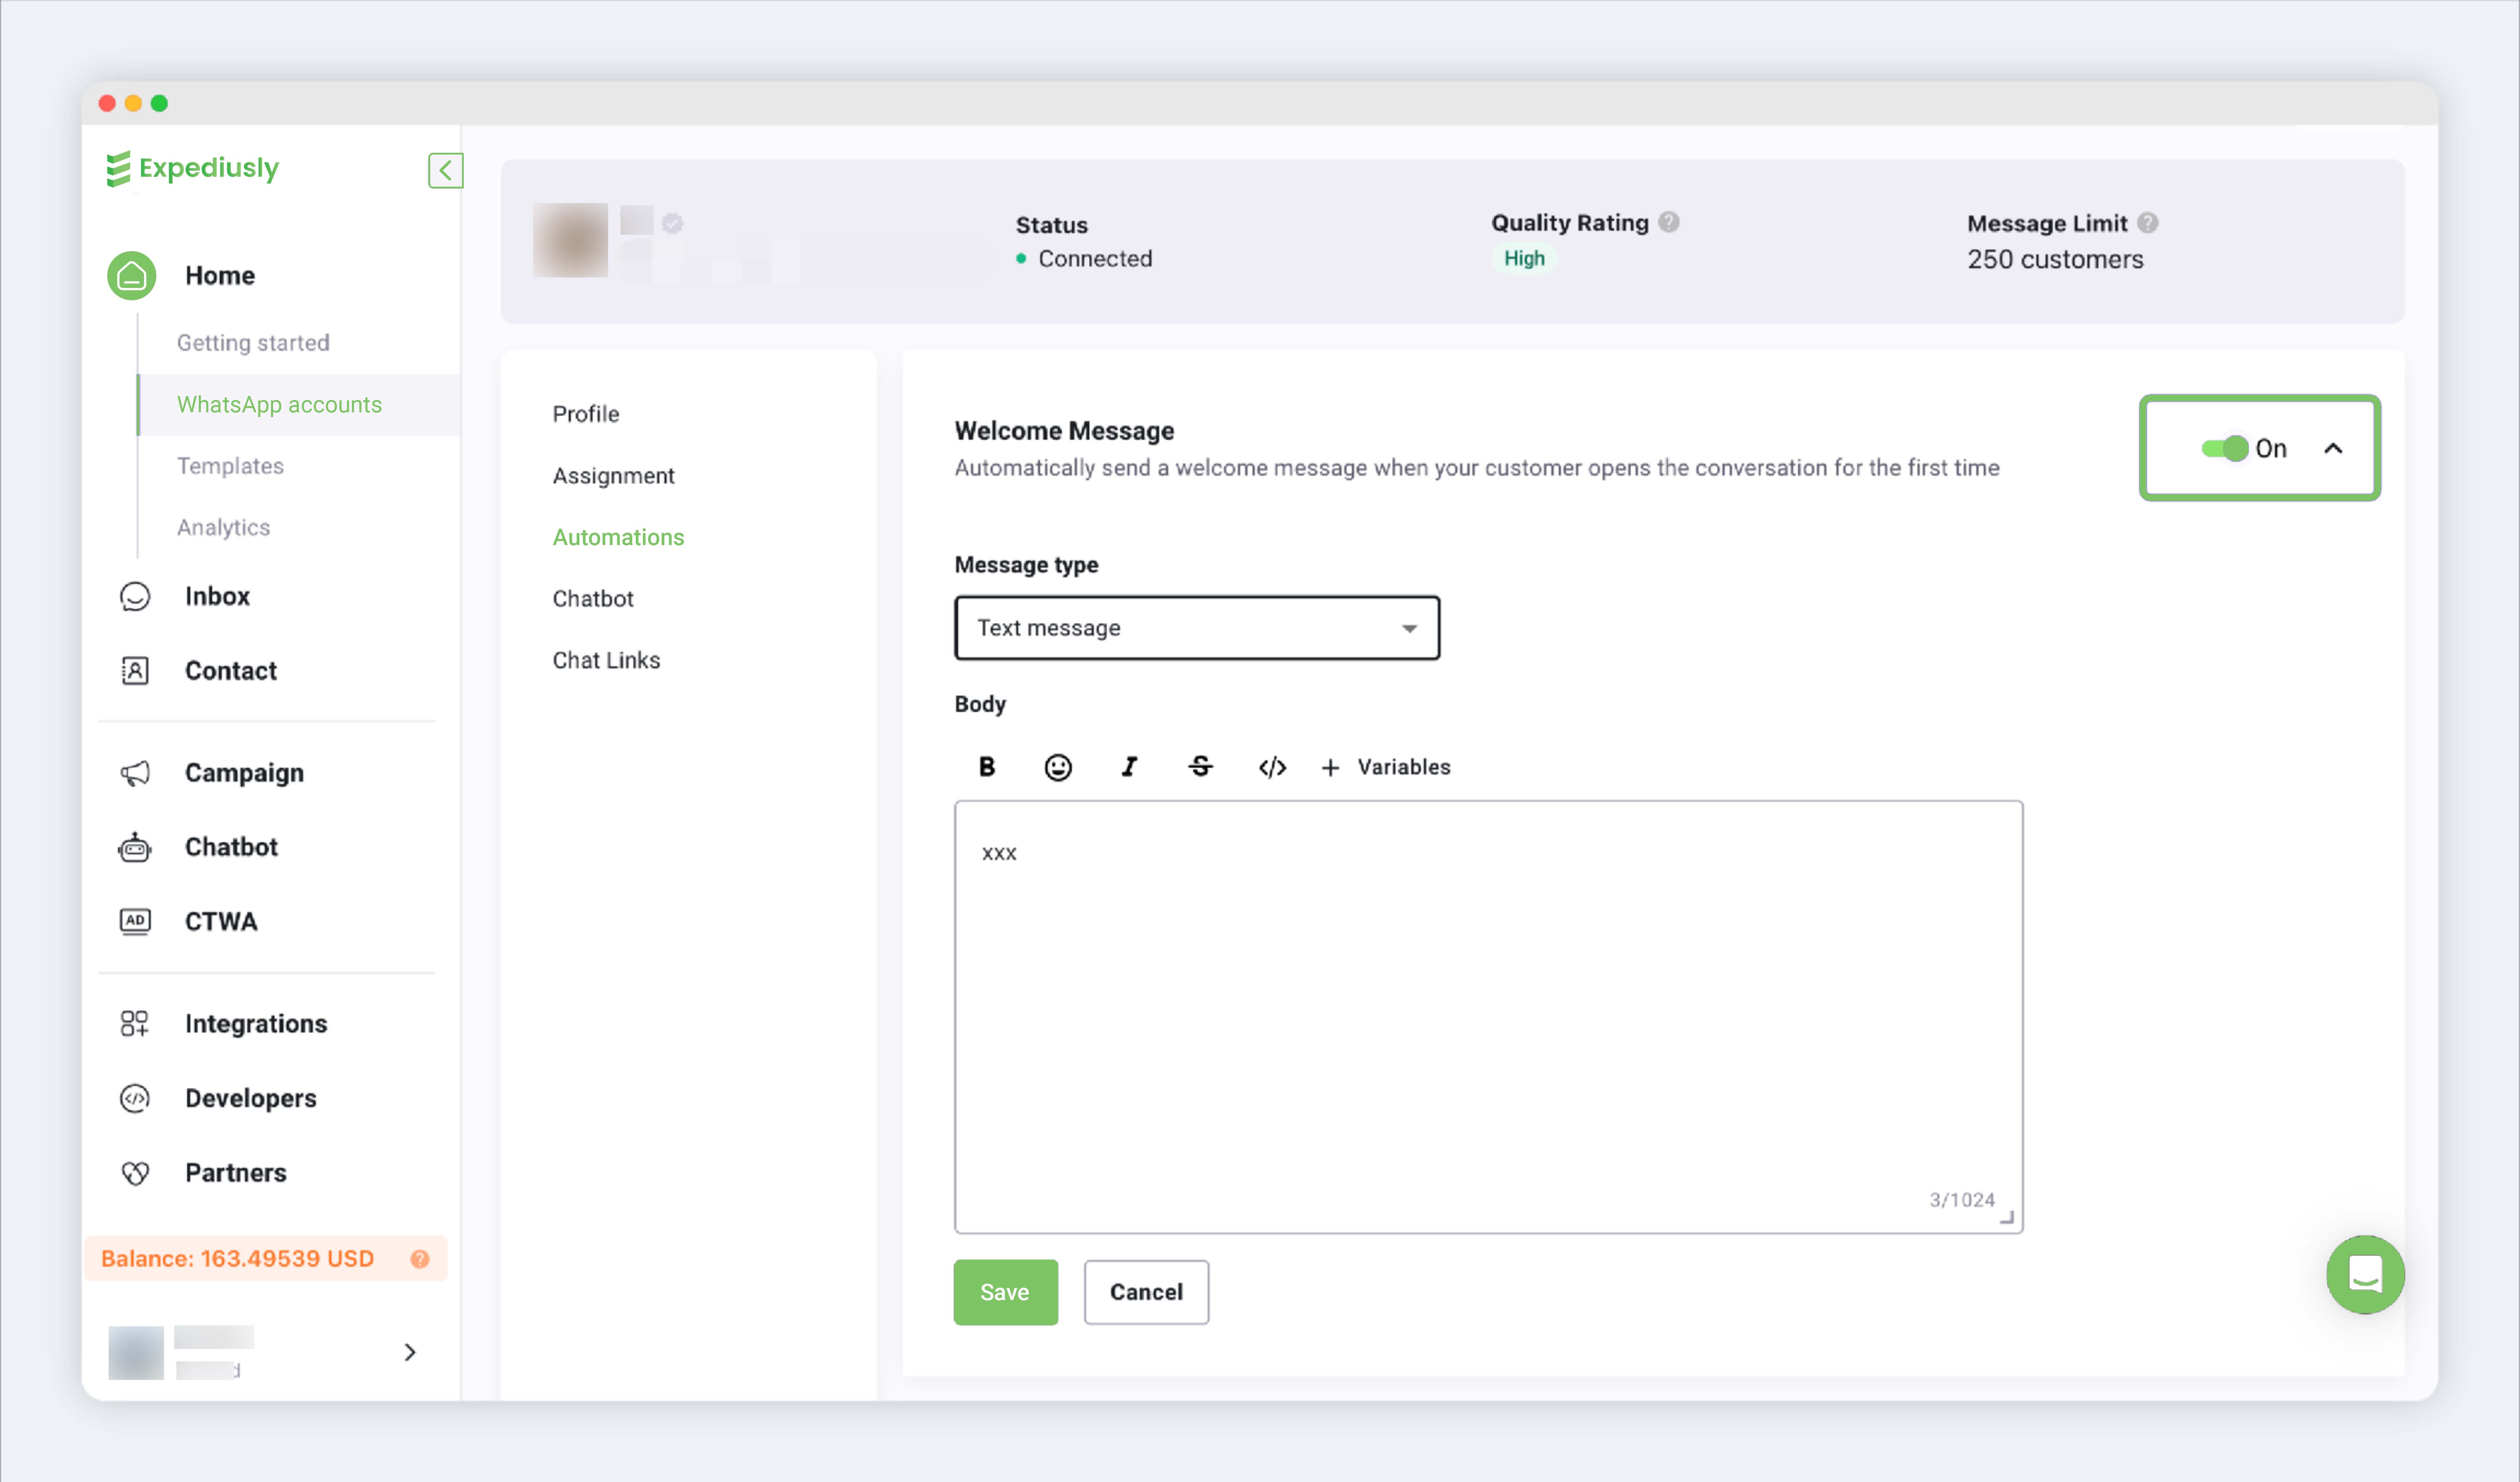
Step 2: Edit the auto-reply message content
Supported message types:
-
Text message: Pure text type message. Supports Emoji, bold, italic, etc.
-
Rich media message: Image/video/file + text type message.
-
Interactive message: Interactive messages with buttons, such as quick reply buttons, view website buttons, list buttons.
Note: For interactive messages, if you want to use list buttons, the Header must be set to None or plain text Header.
Ice breakers
Ice breakers provide users with a way to start a conversation with a business through a list of common questions. When a user opens your chat window, a list of preset ice breaker phrases will appear in the user's input box, and the user can send a message immediately by clicking on it.
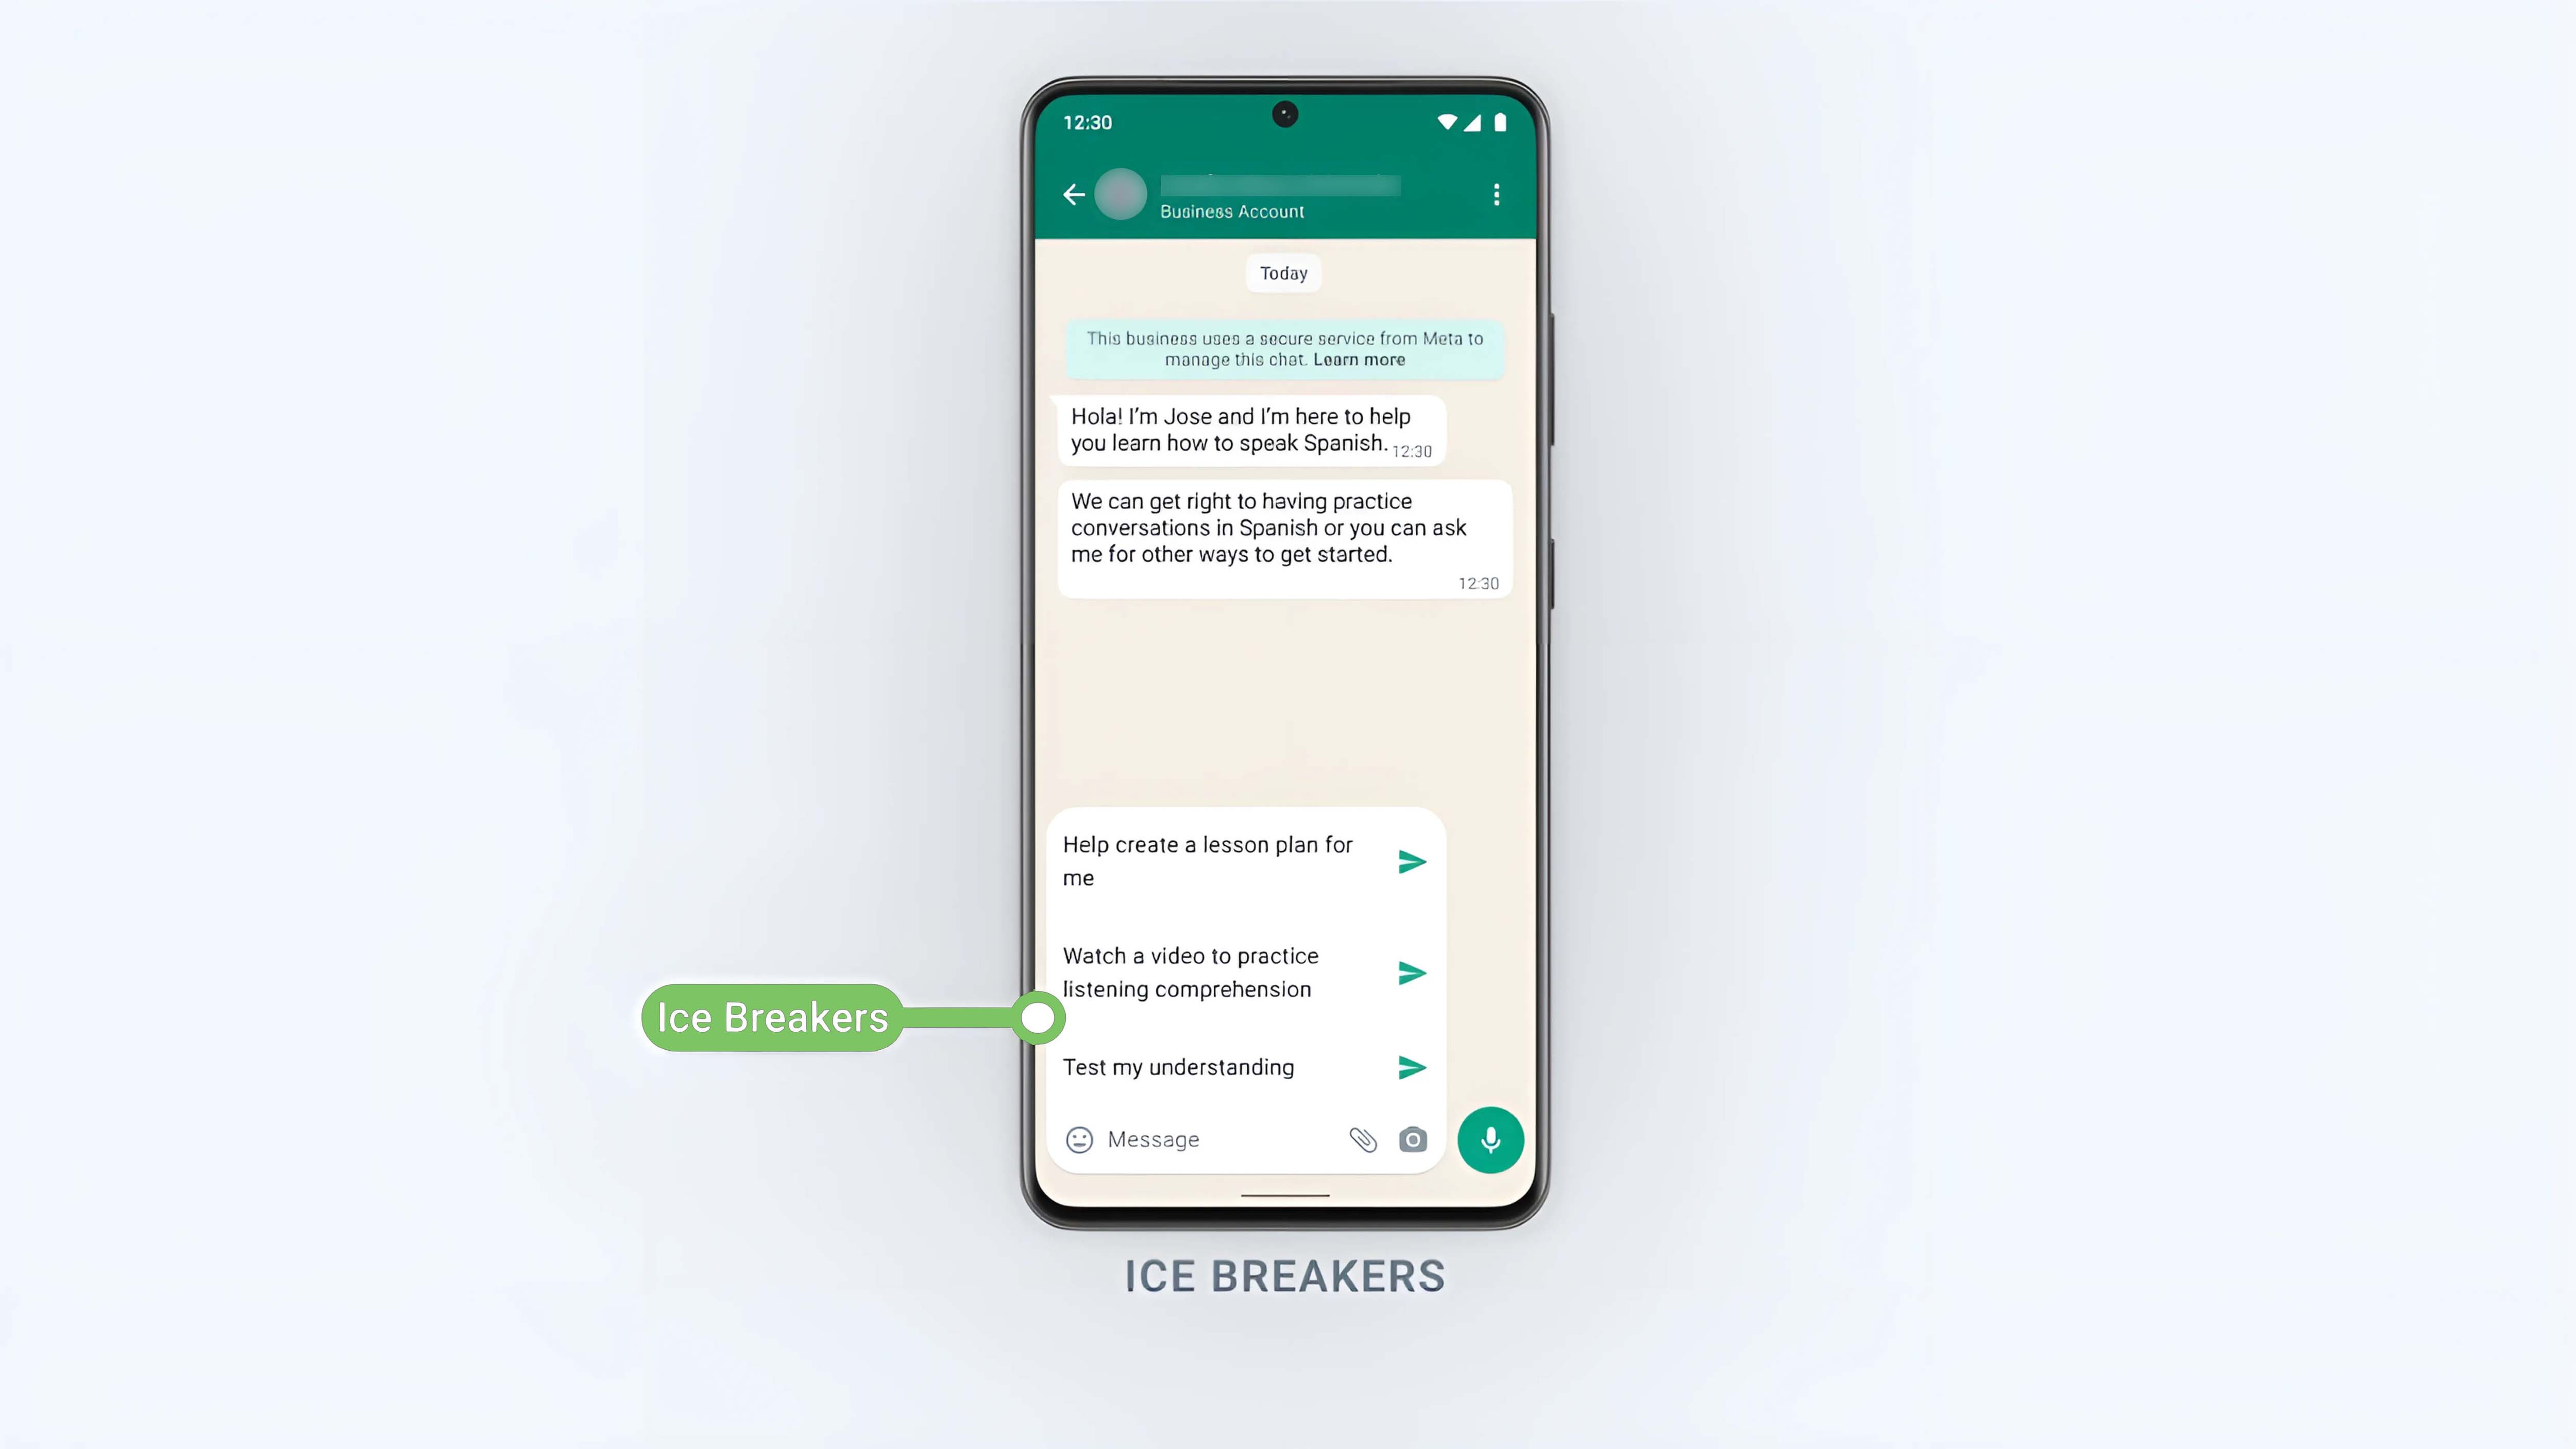
Ice breakers
Rules: You can configure up to 4 ice breakers on a phone number. Each ice breaker can have up to 80 characters. Emojis are not supported.
Steps
Step 1: Enable the ice breaker switch
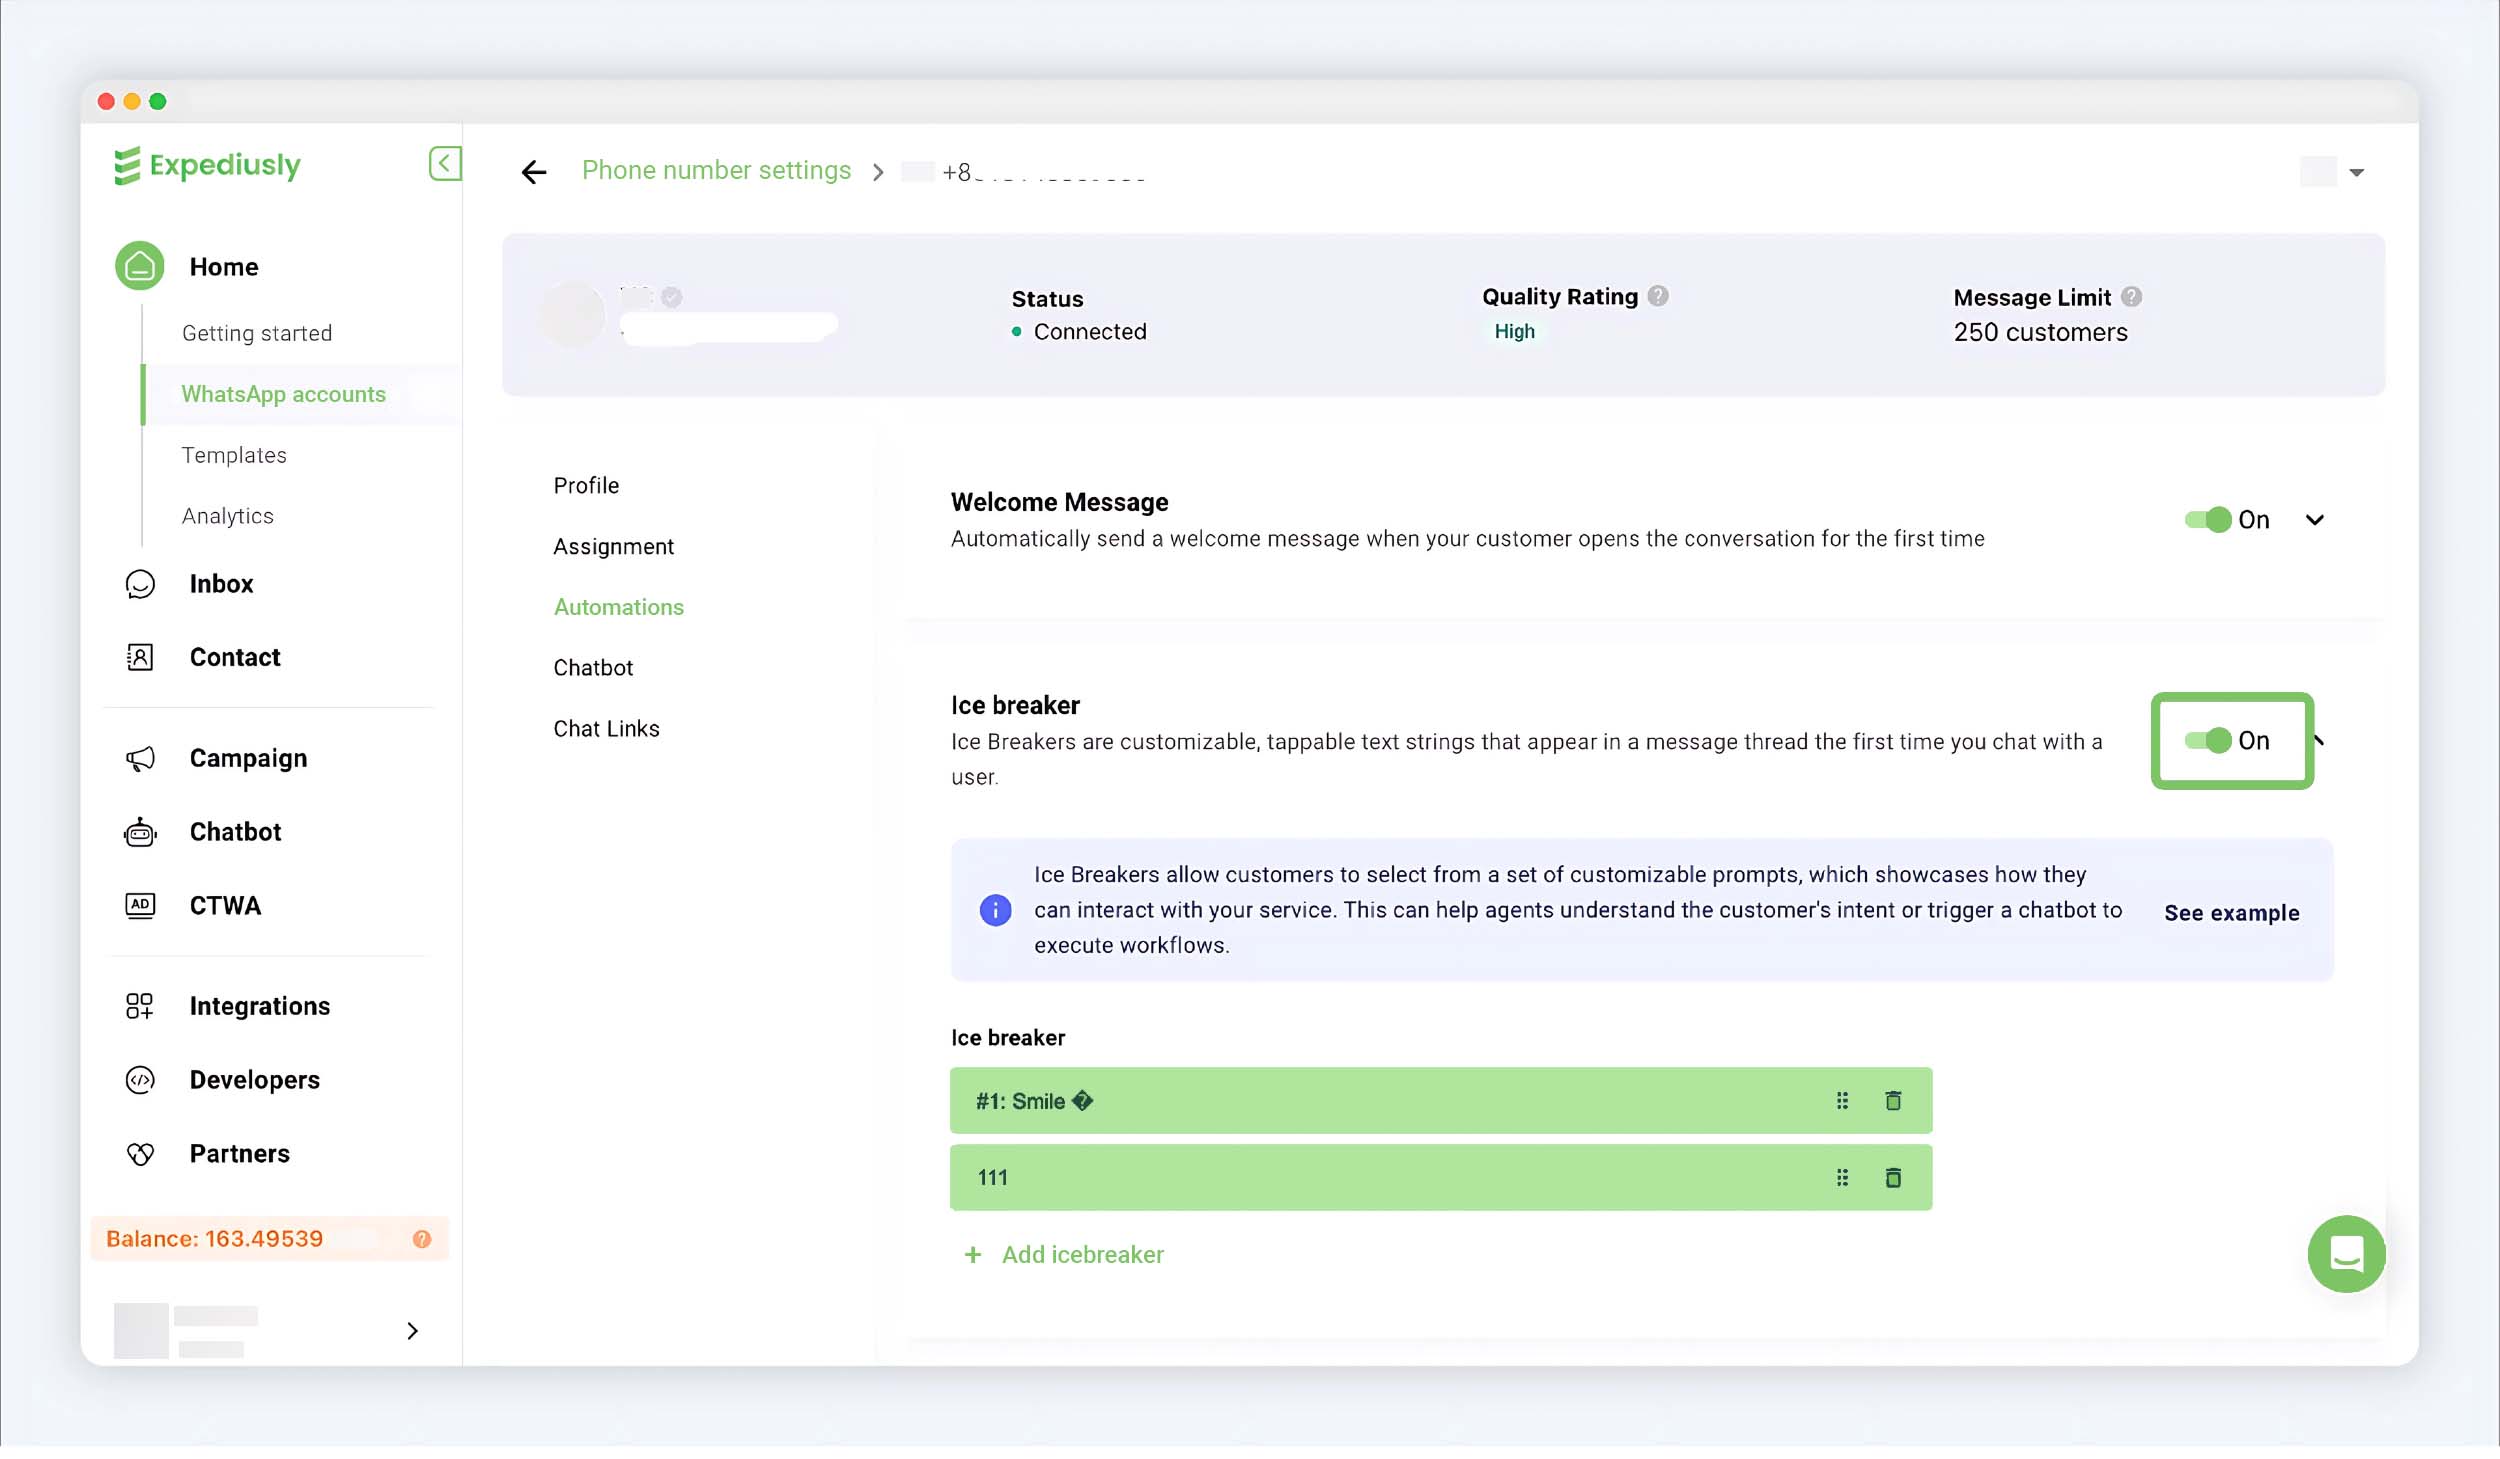
Enable ice breaker
Step 2: Set options
After setting the options, click Save.
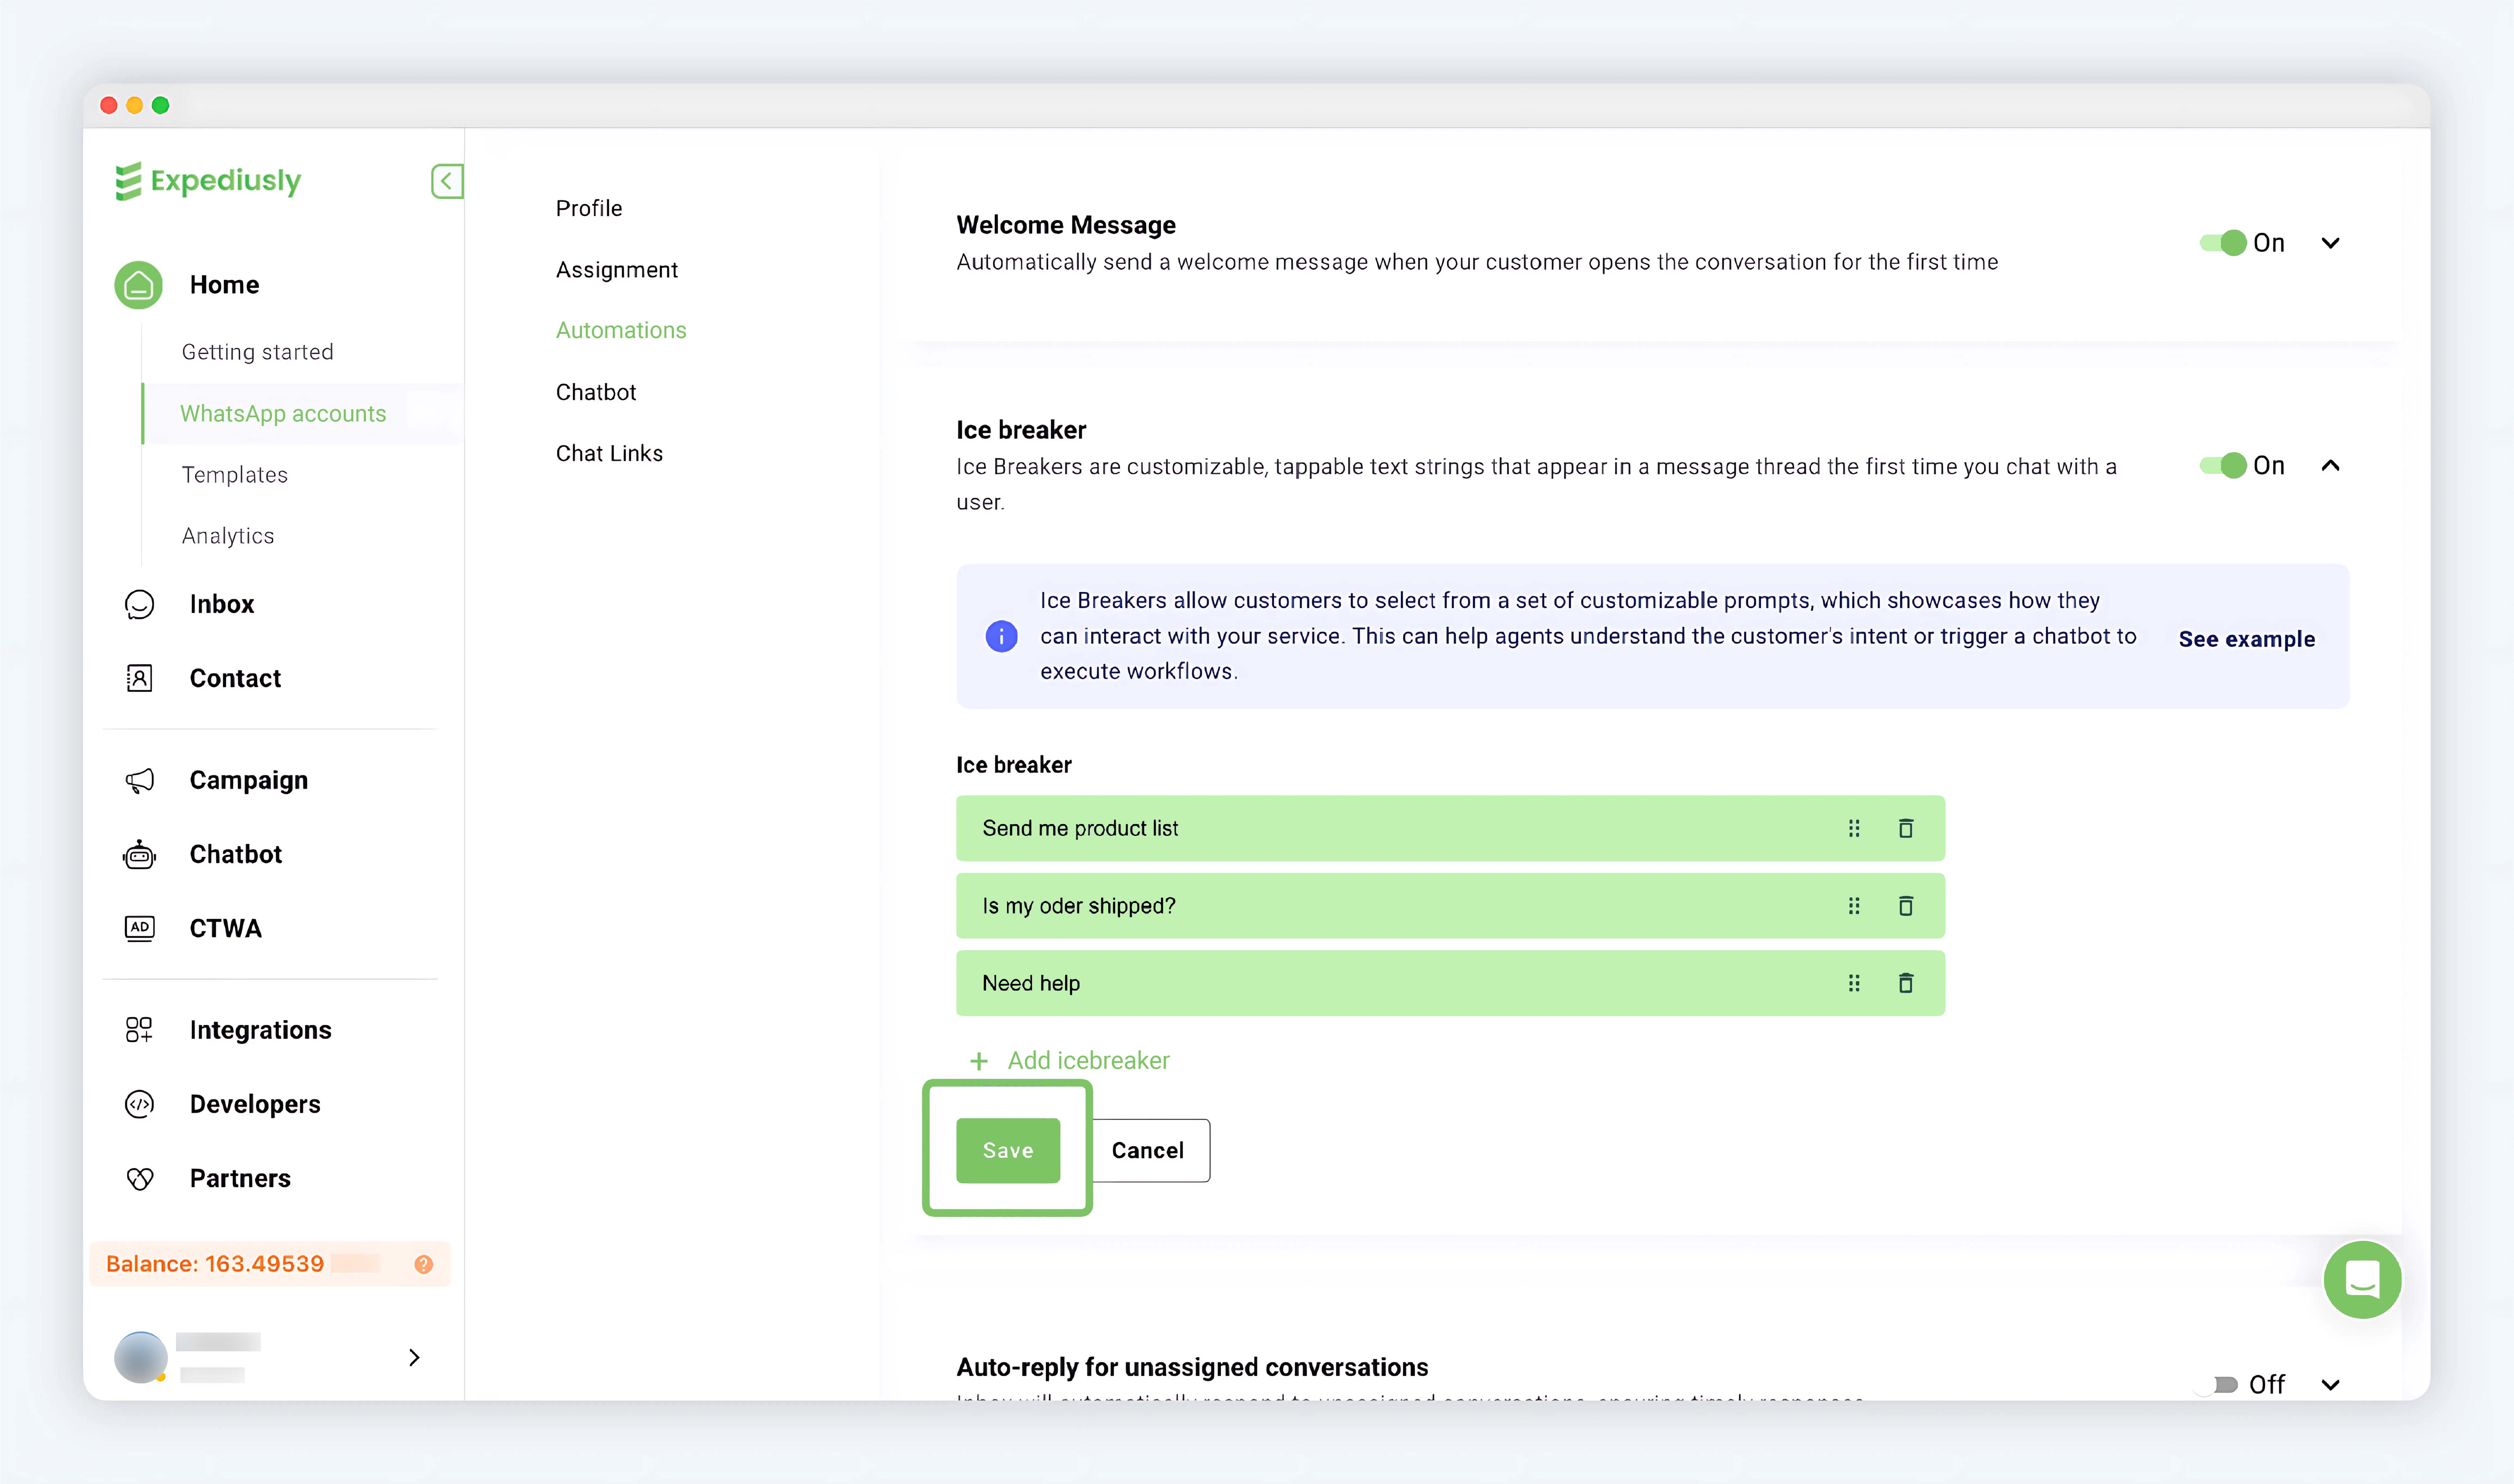
Edit and save Ice breaker
Auto-reply for unassigned conversations
When a conversation enters unassigned, which means no one is serving the conversation, the system automatically replies to the customer with a message to ensure timely response.
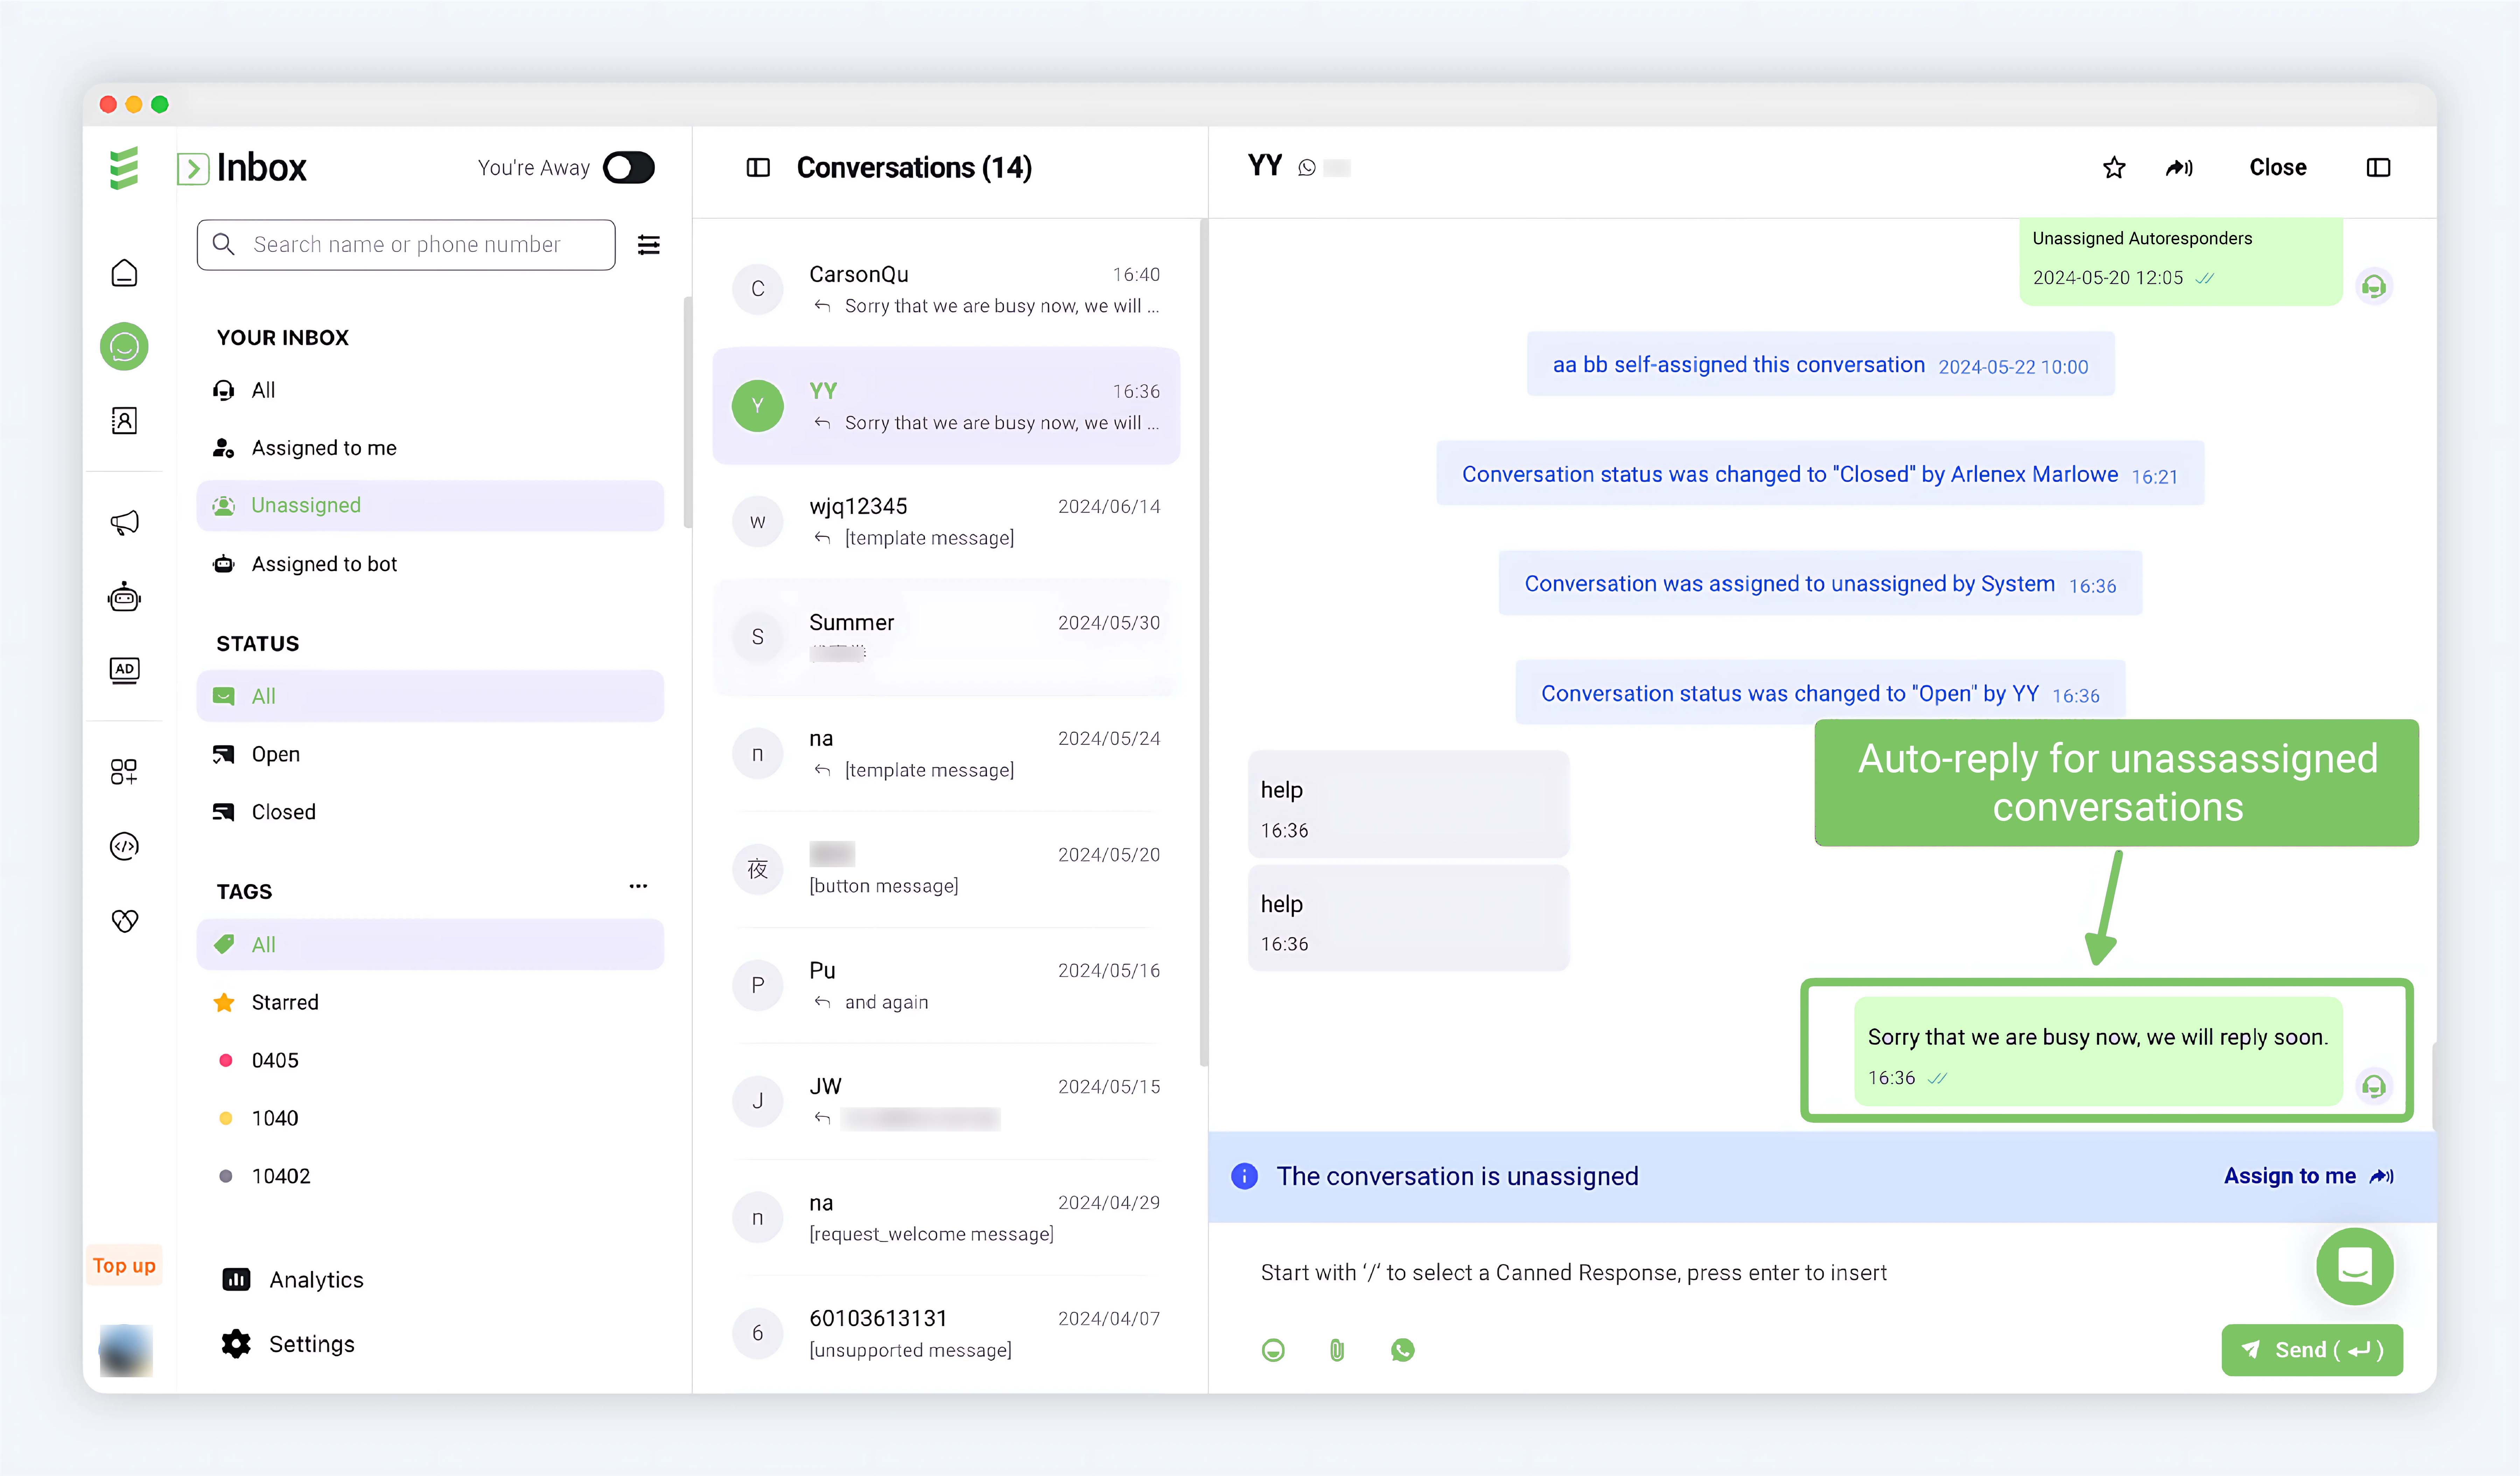
Auto-reply for unassigned message
Steps
Step 1: Turn on the switch
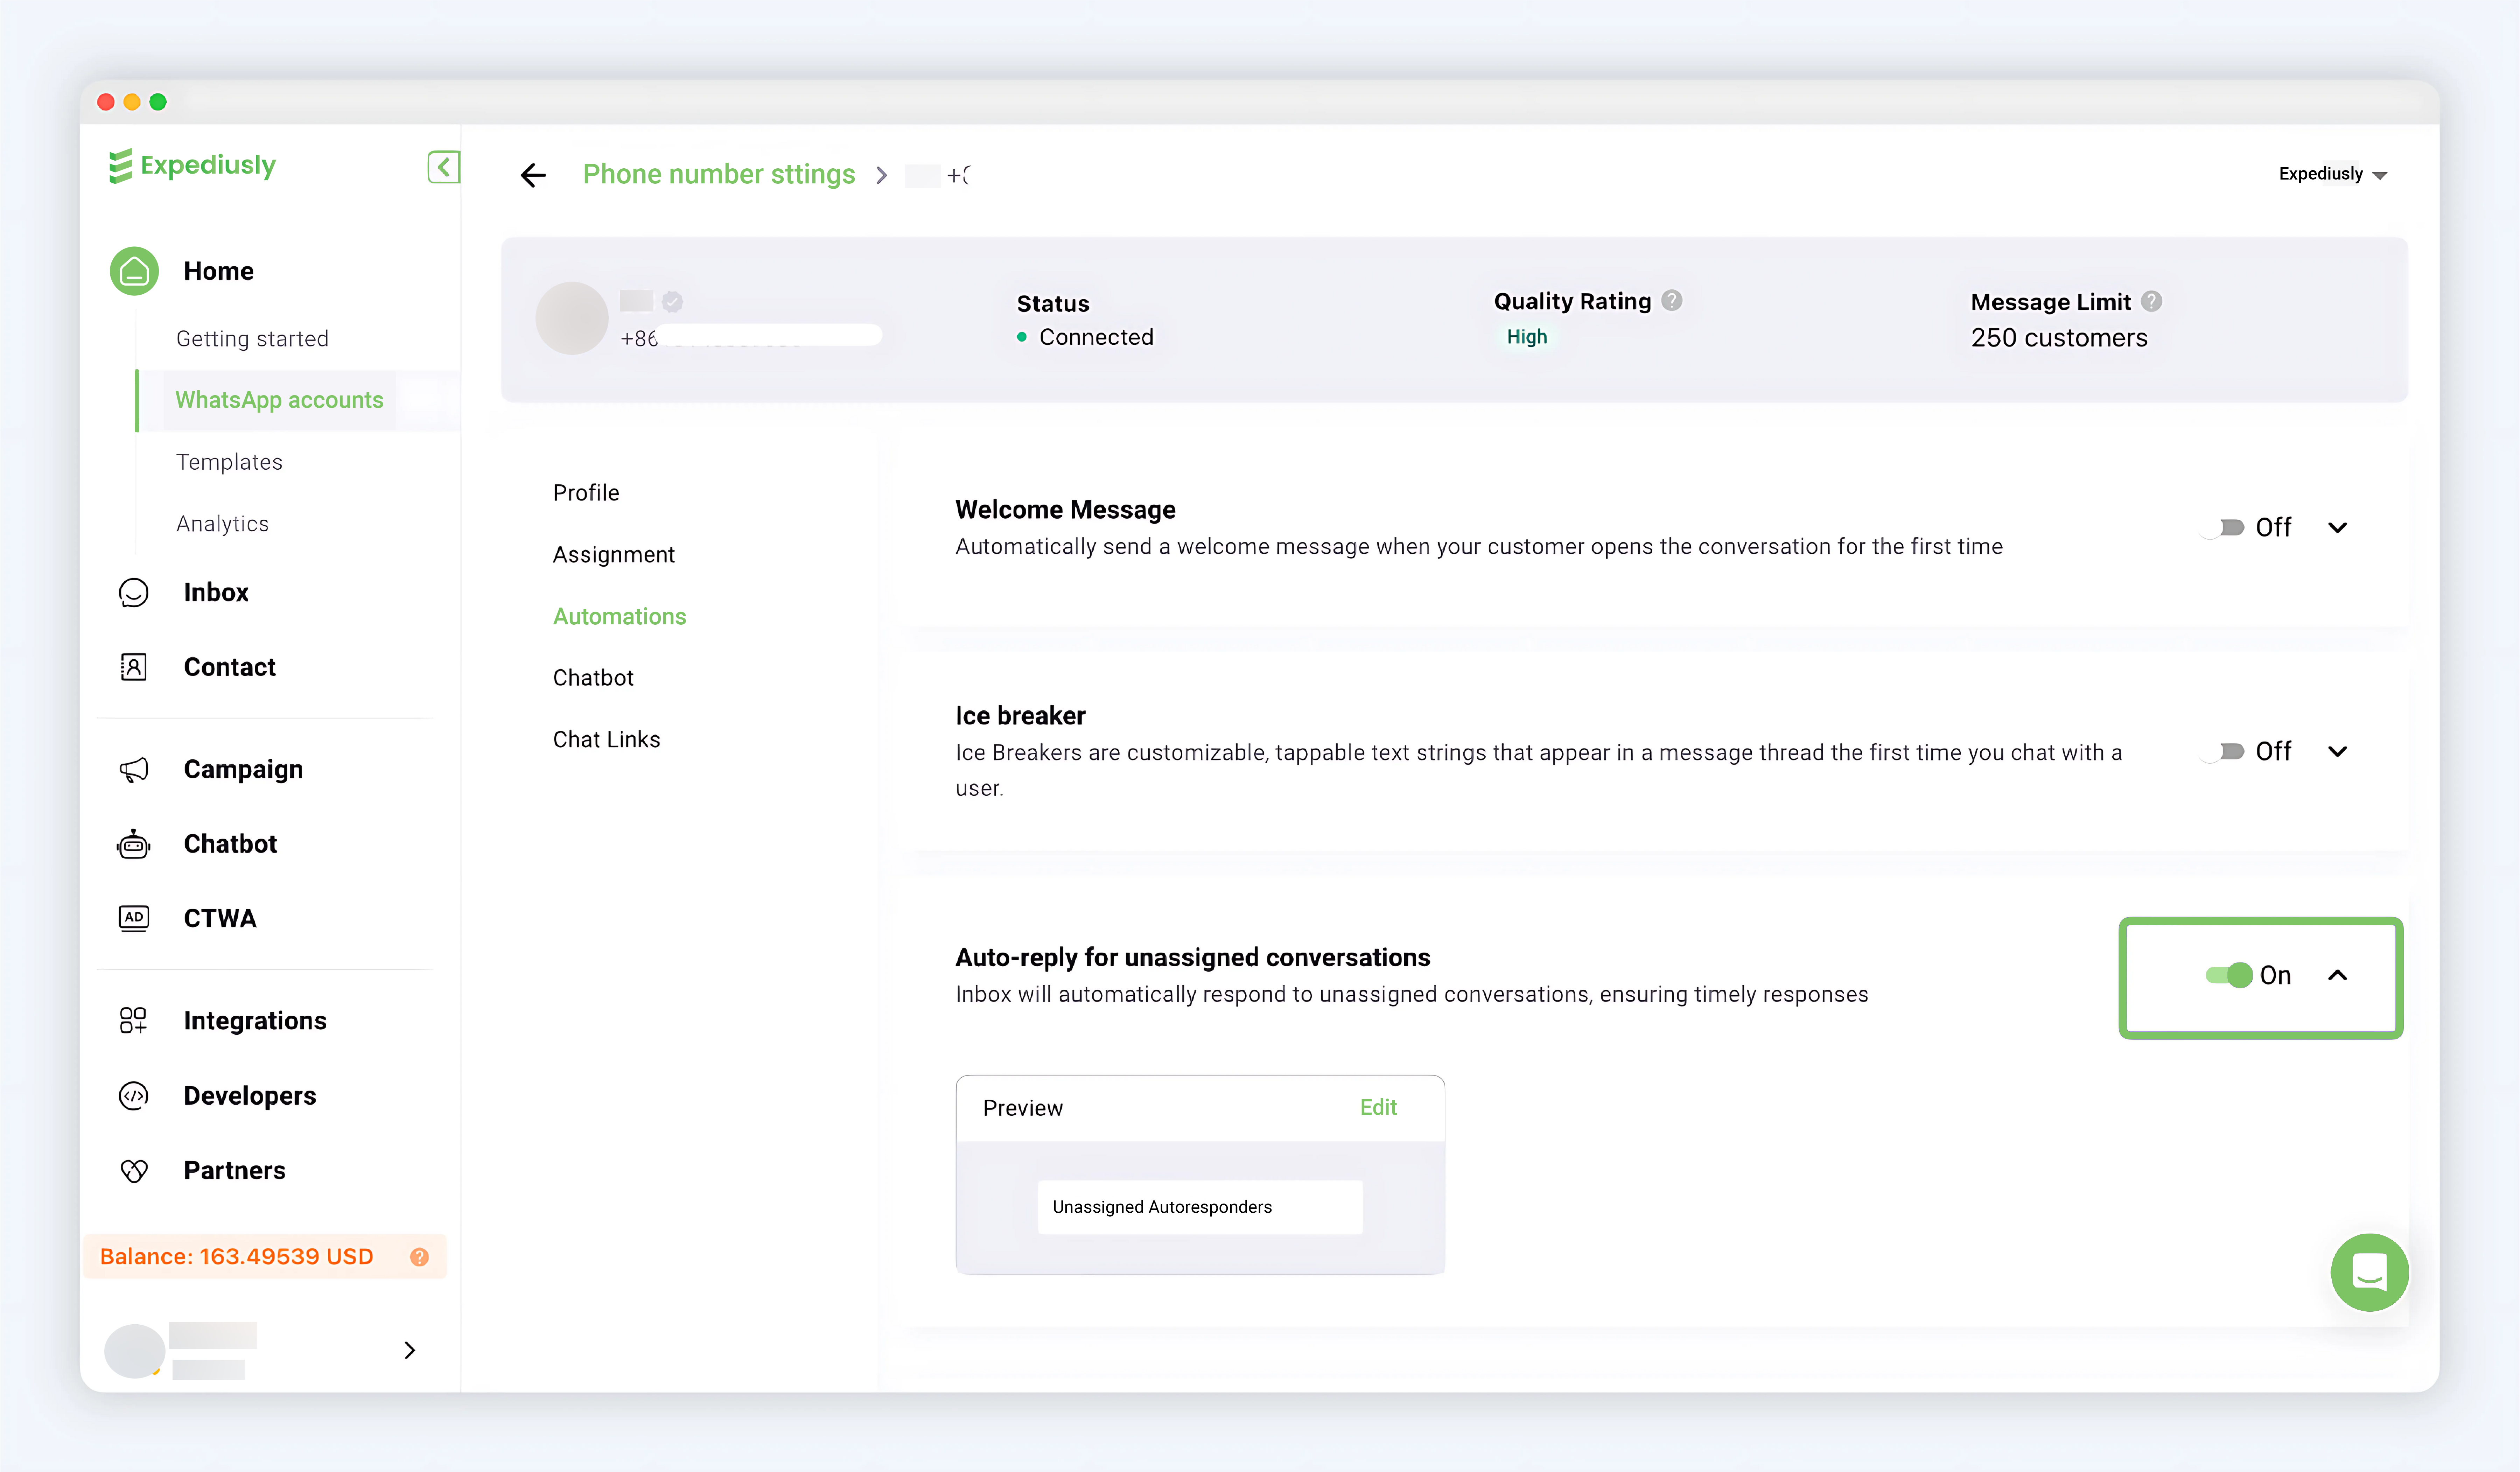
Enable auto-reply for unassigned conversations
Step 2: Edit the auto-reply content
Click the Edit button to edit. Supported message types:
-
Text message: Pure text type message. Supports Emoji, bold, italic, etc.
-
Rich media message: Image/video/file + text type message.
-
Interactive message: Interactive messages with buttons, such as quick reply buttons, view website buttons, list buttons.
After setting, click Save.
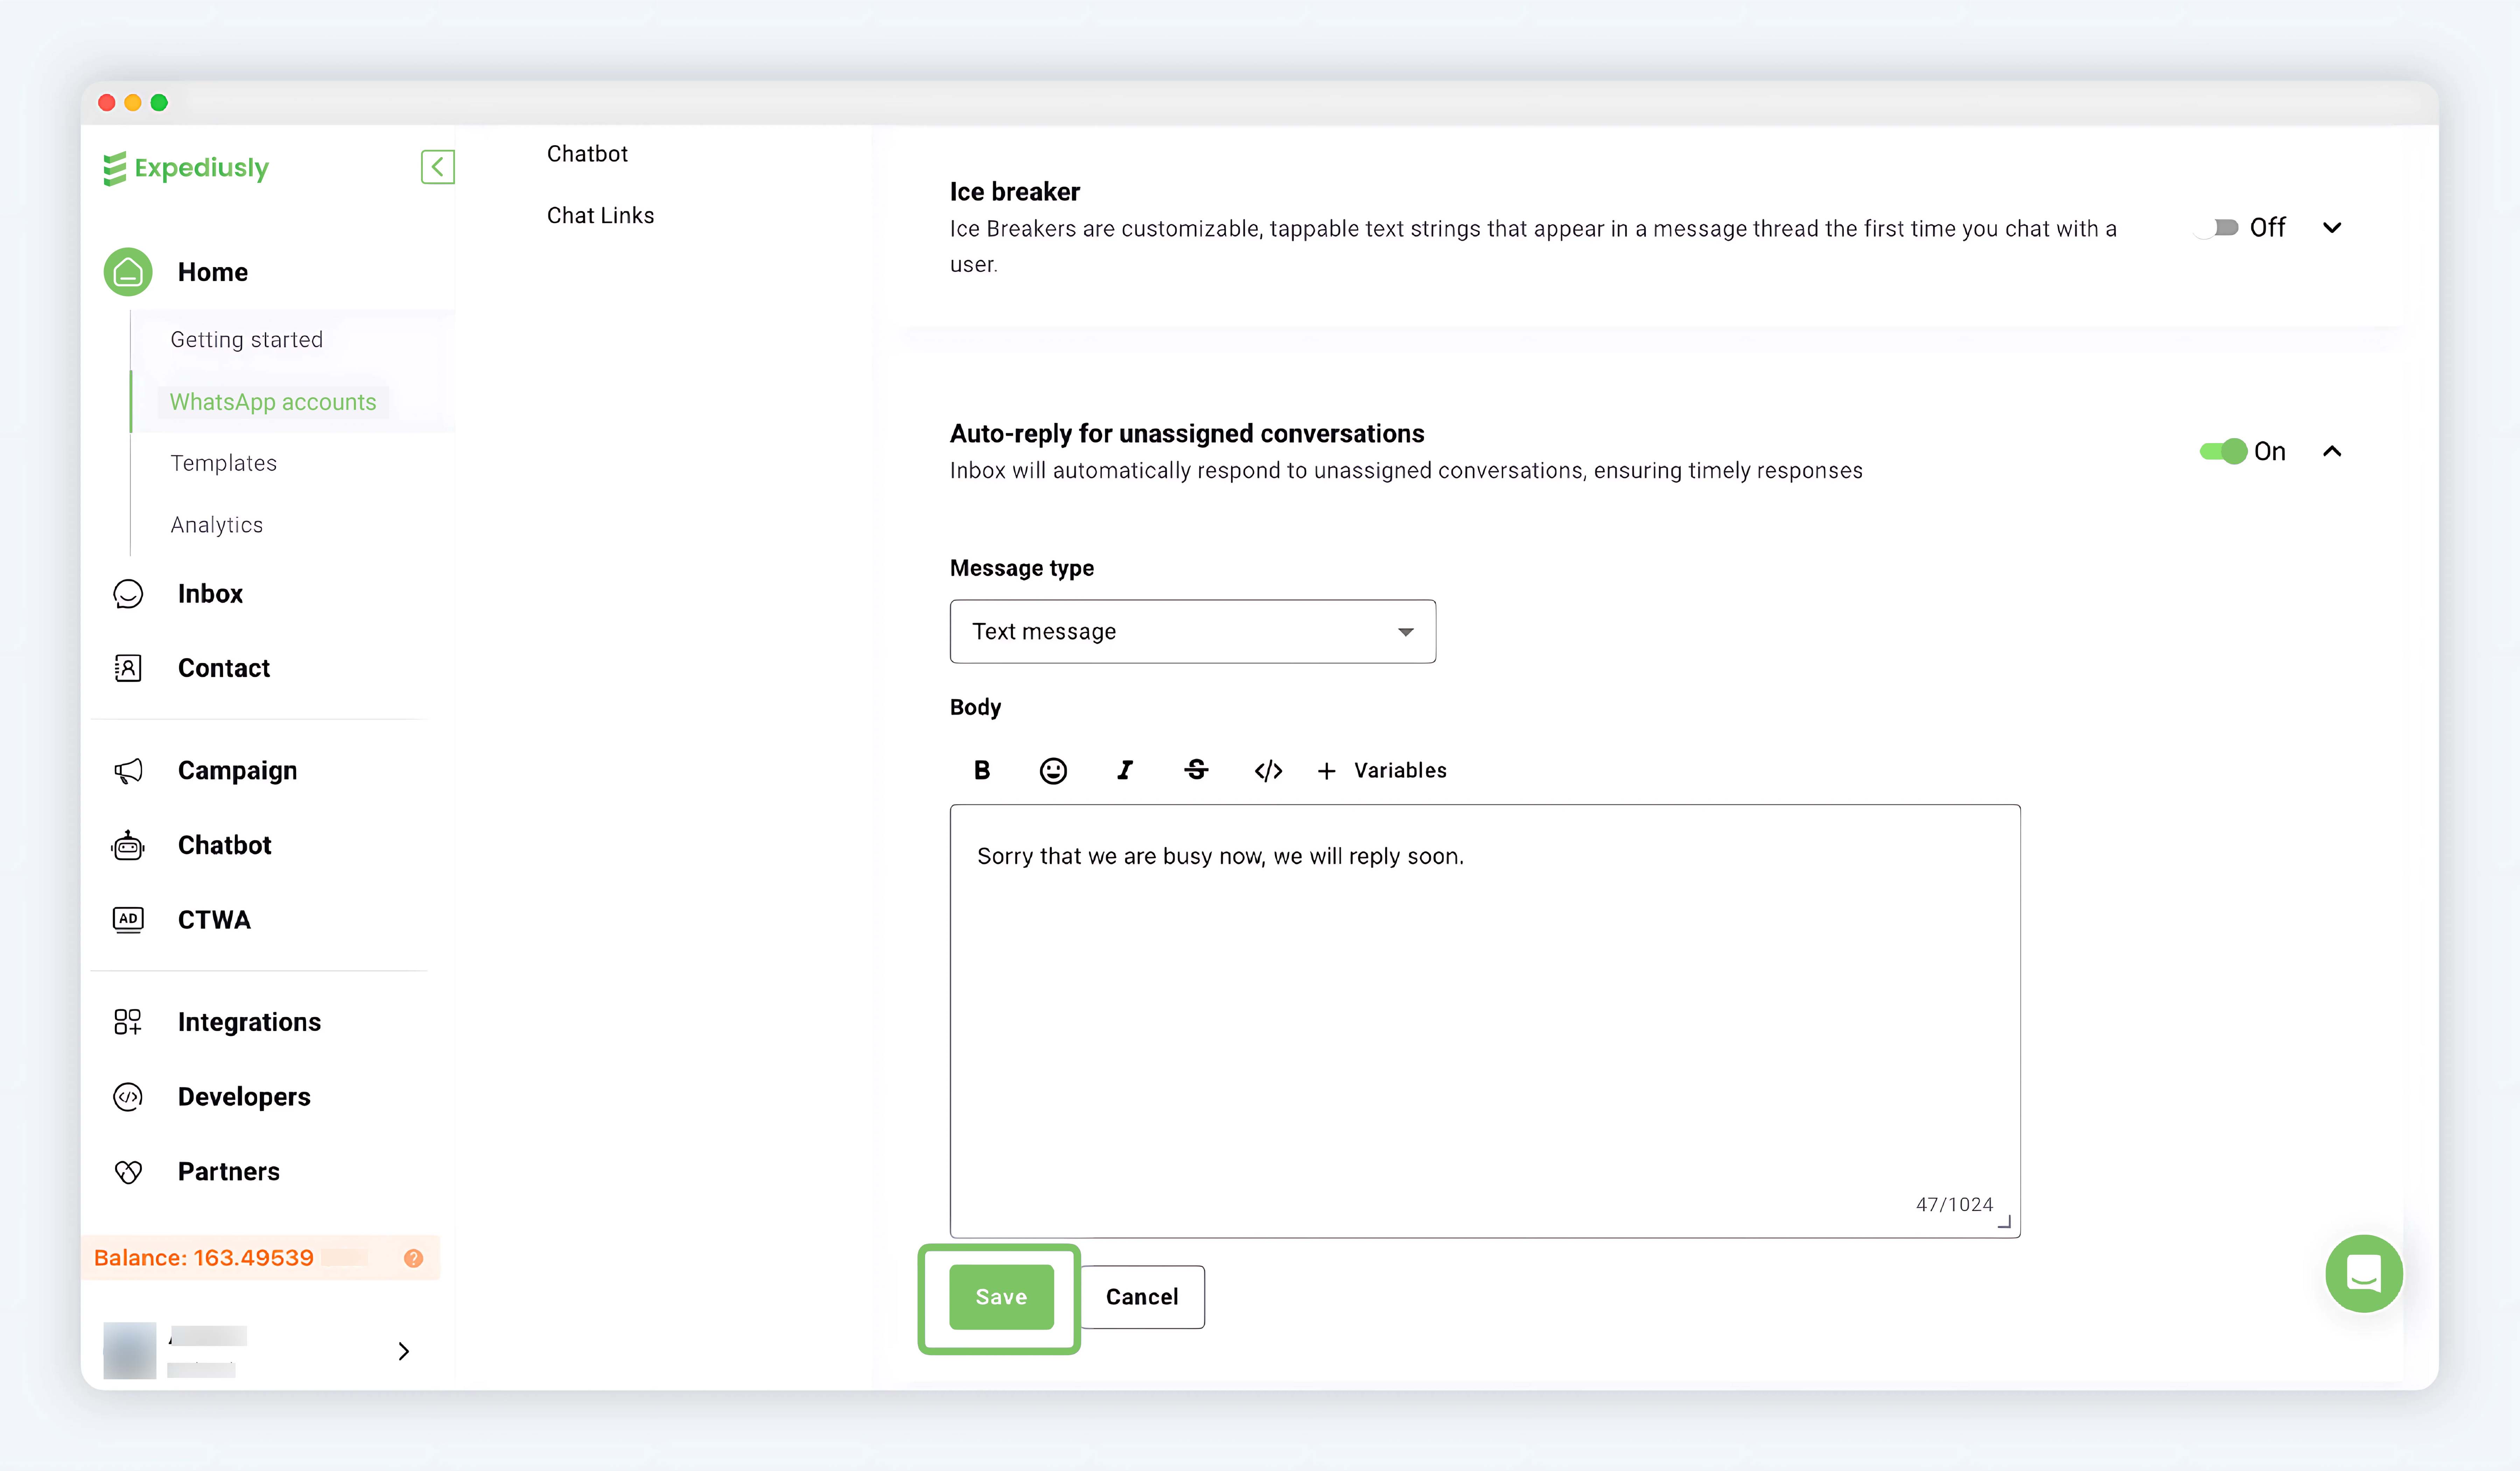
Edit and save auto-reply for unassigned conversations
Auto-reply for in queue conversations
When this switch is turned on, conversations in the queue will receive an automatically sent message, notifying the customer that they are currently in a waiting state, ensuring timely responses.
If a staff member who has reached their reception limit closes one of their ongoing conversations, a conversation from the queue will automatically be assigned to their inbox.
Additionally, staff members can also manually claim conversations that are in the queue.
Steps
Method 1:
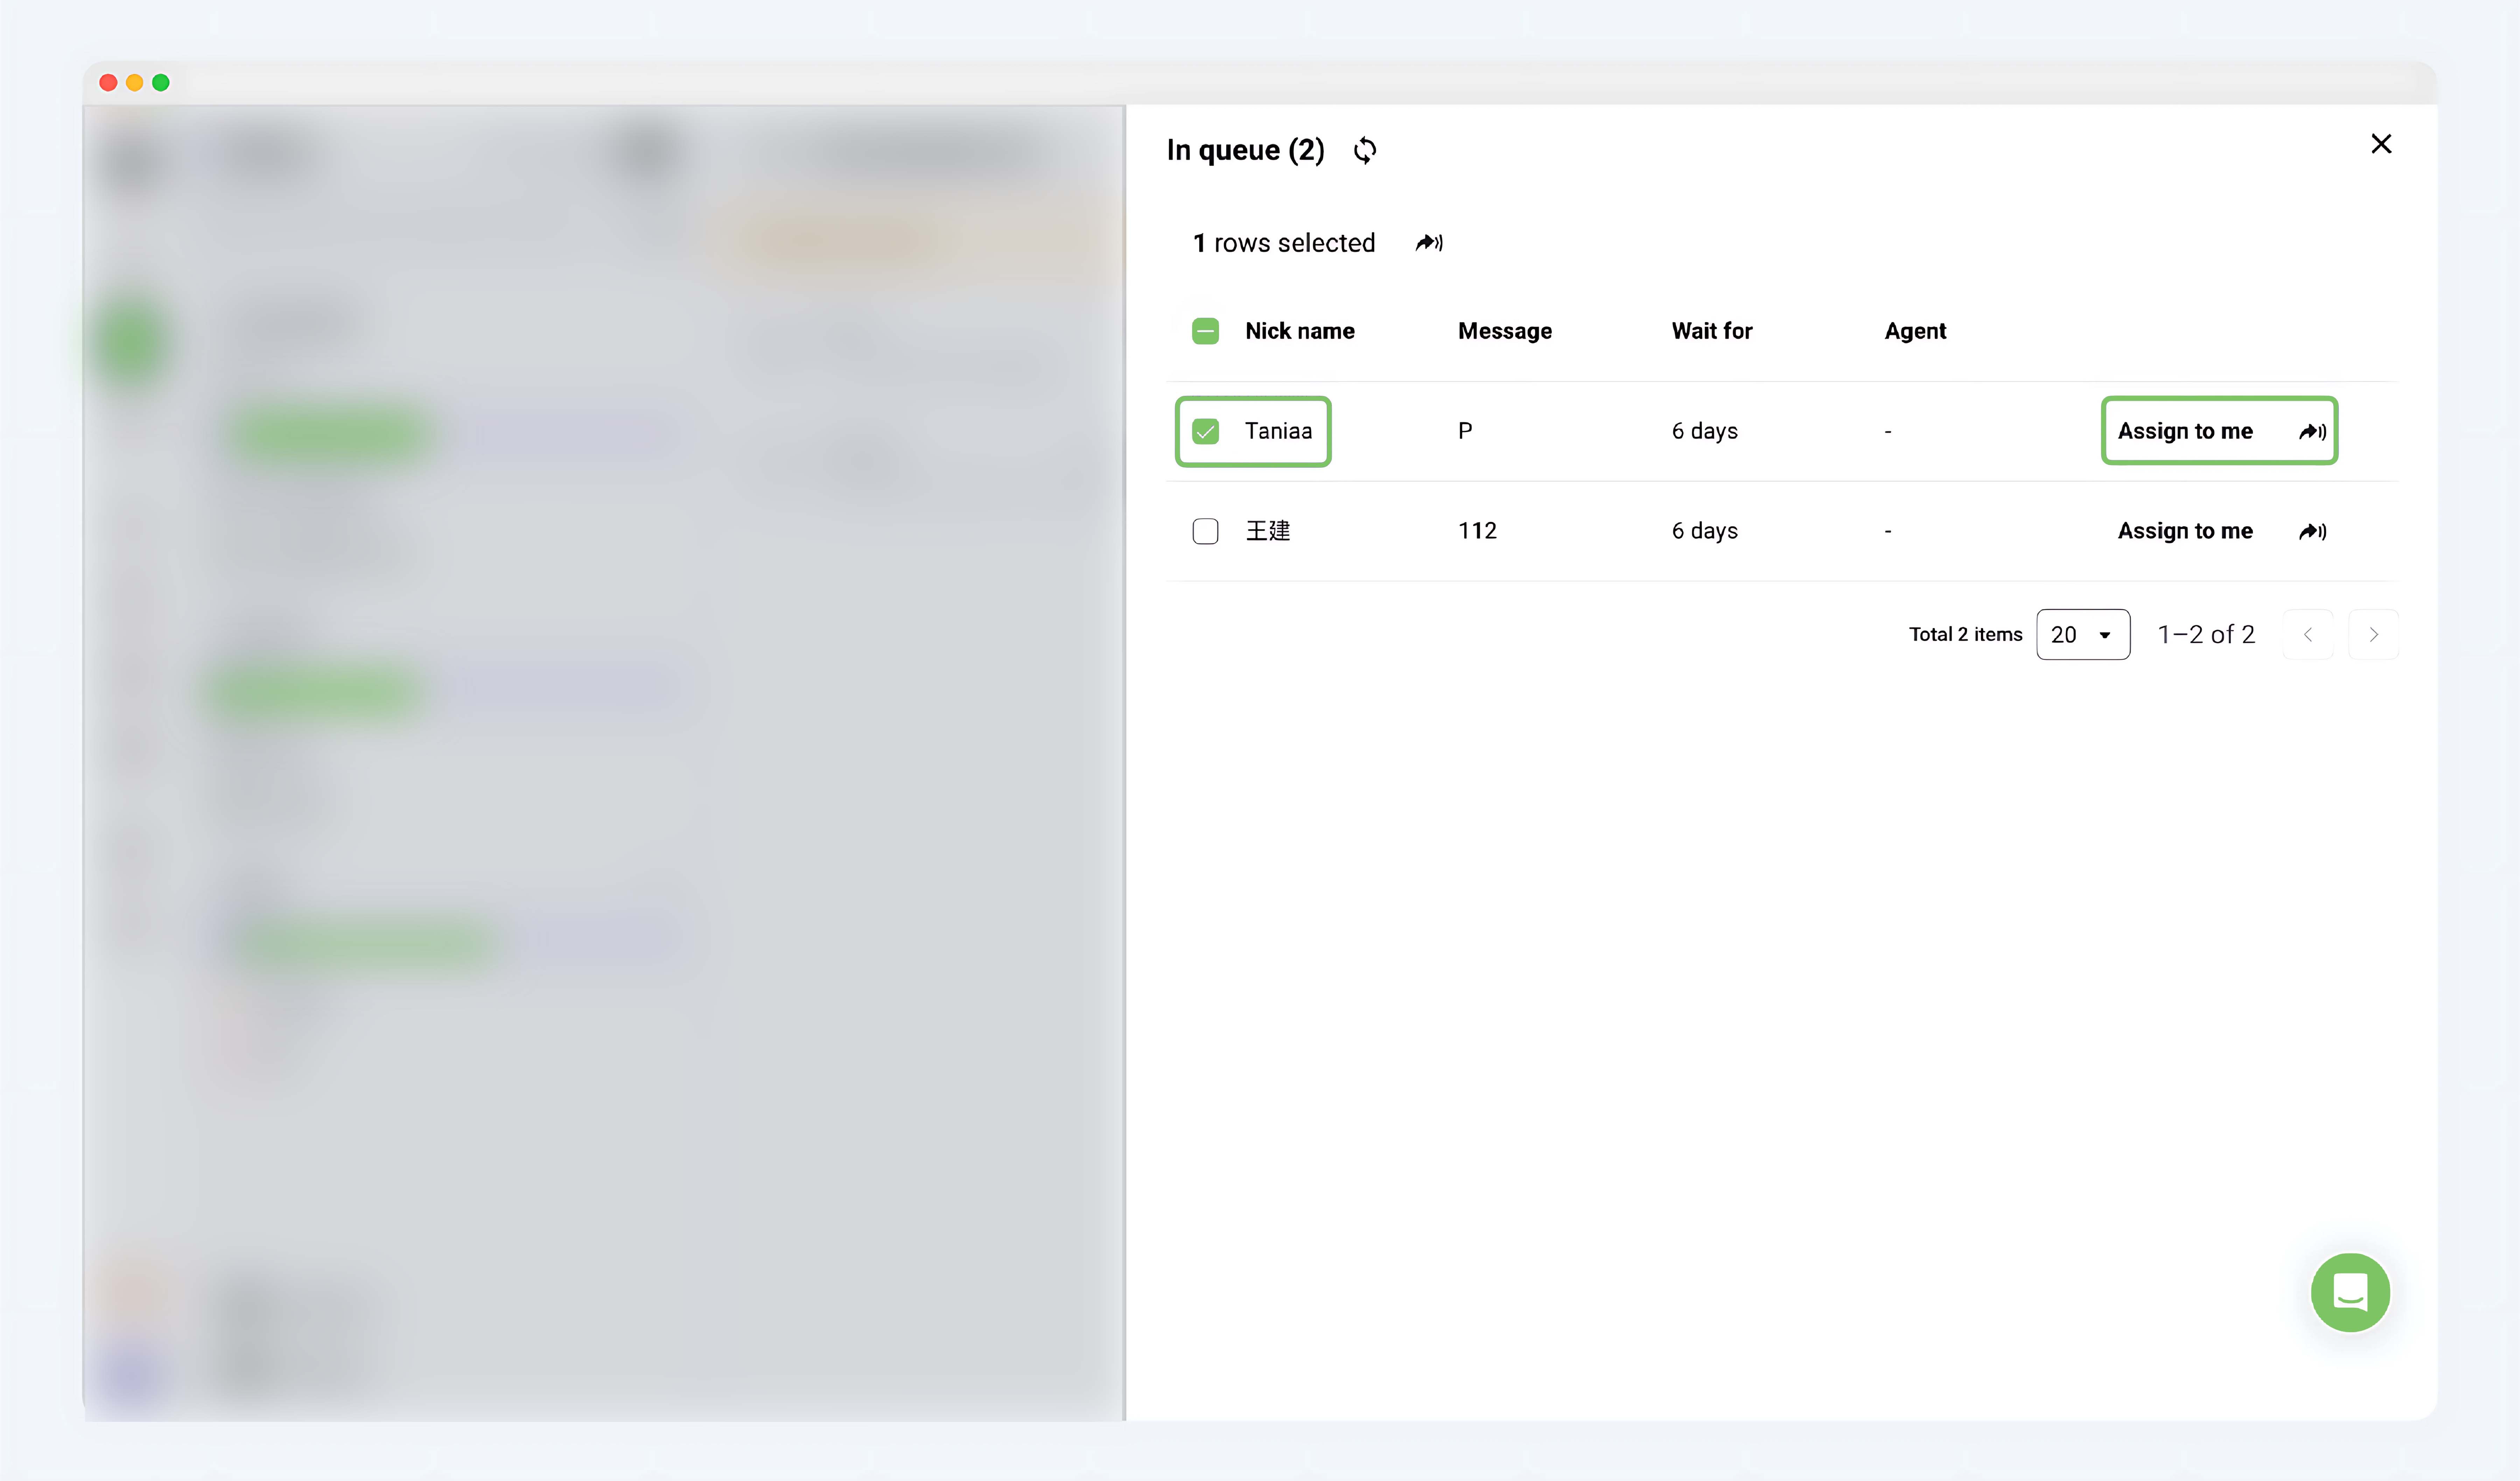
When the reception limit is reached, the number of people currently in the queue will be displayed at the top of the staff member's Inbox interface. Click on people in queue, select the conversation you want to transfer to yourself, and the transfer will be successful.
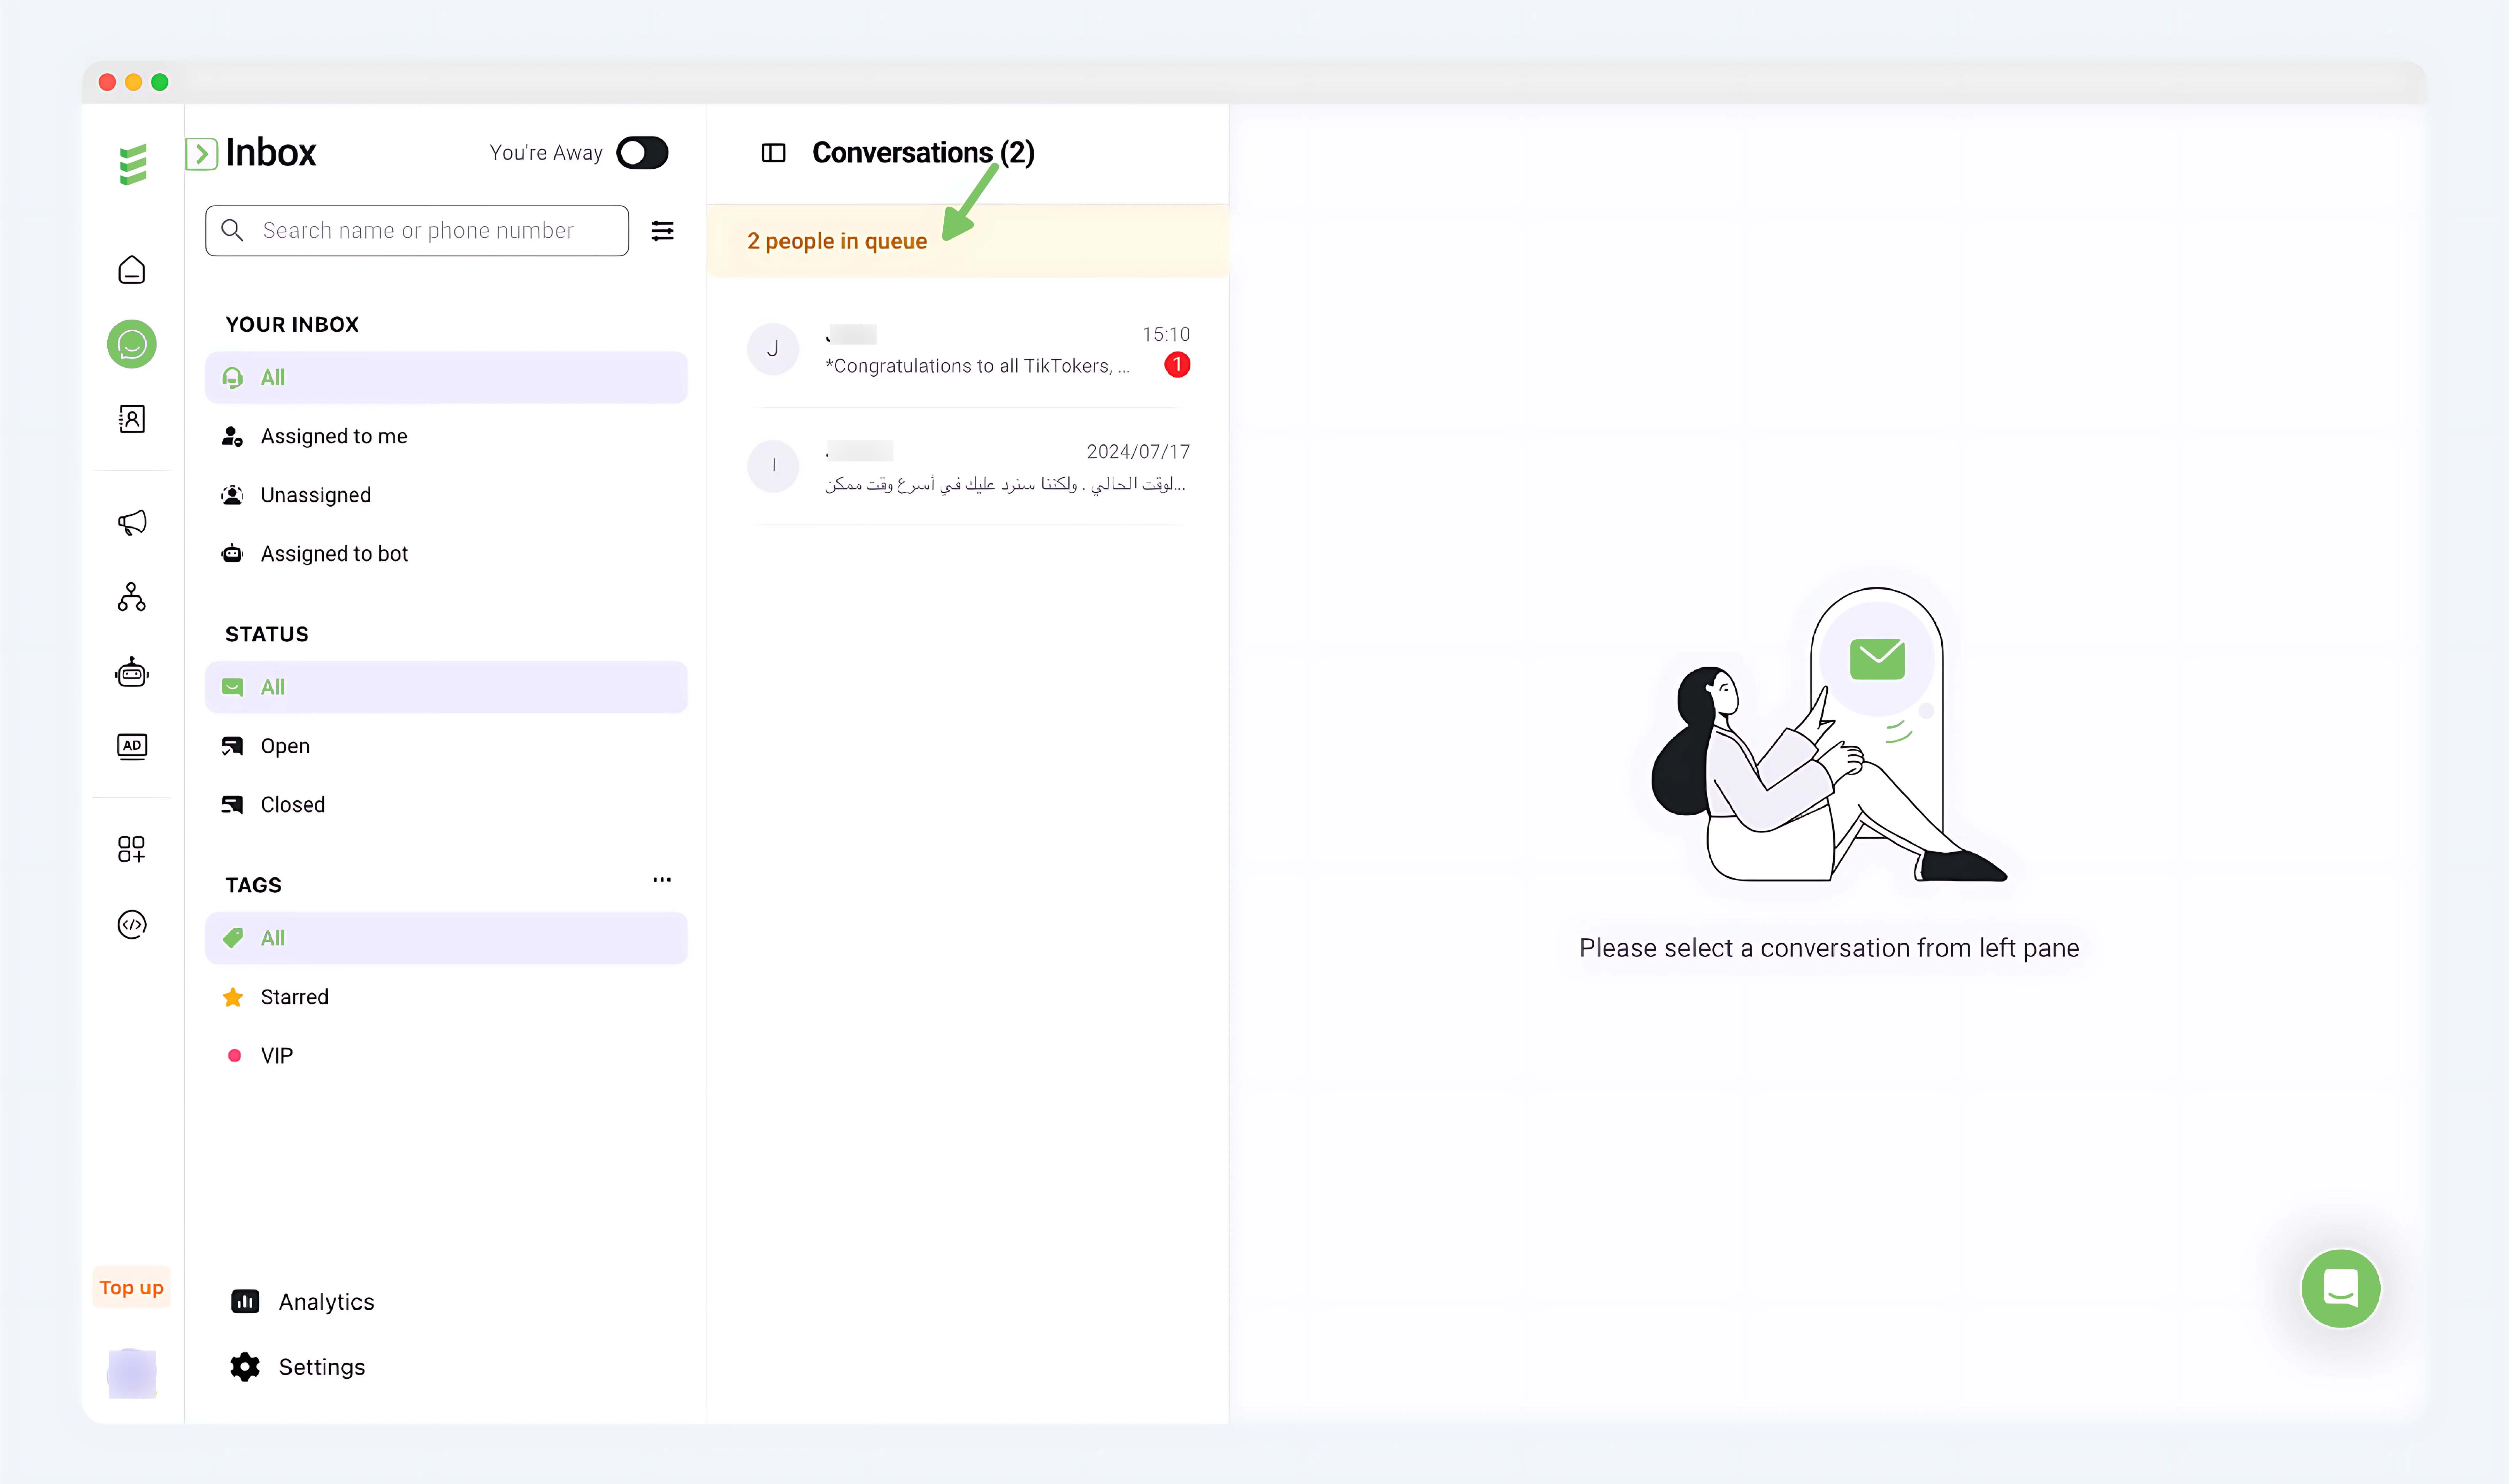
Method 2:
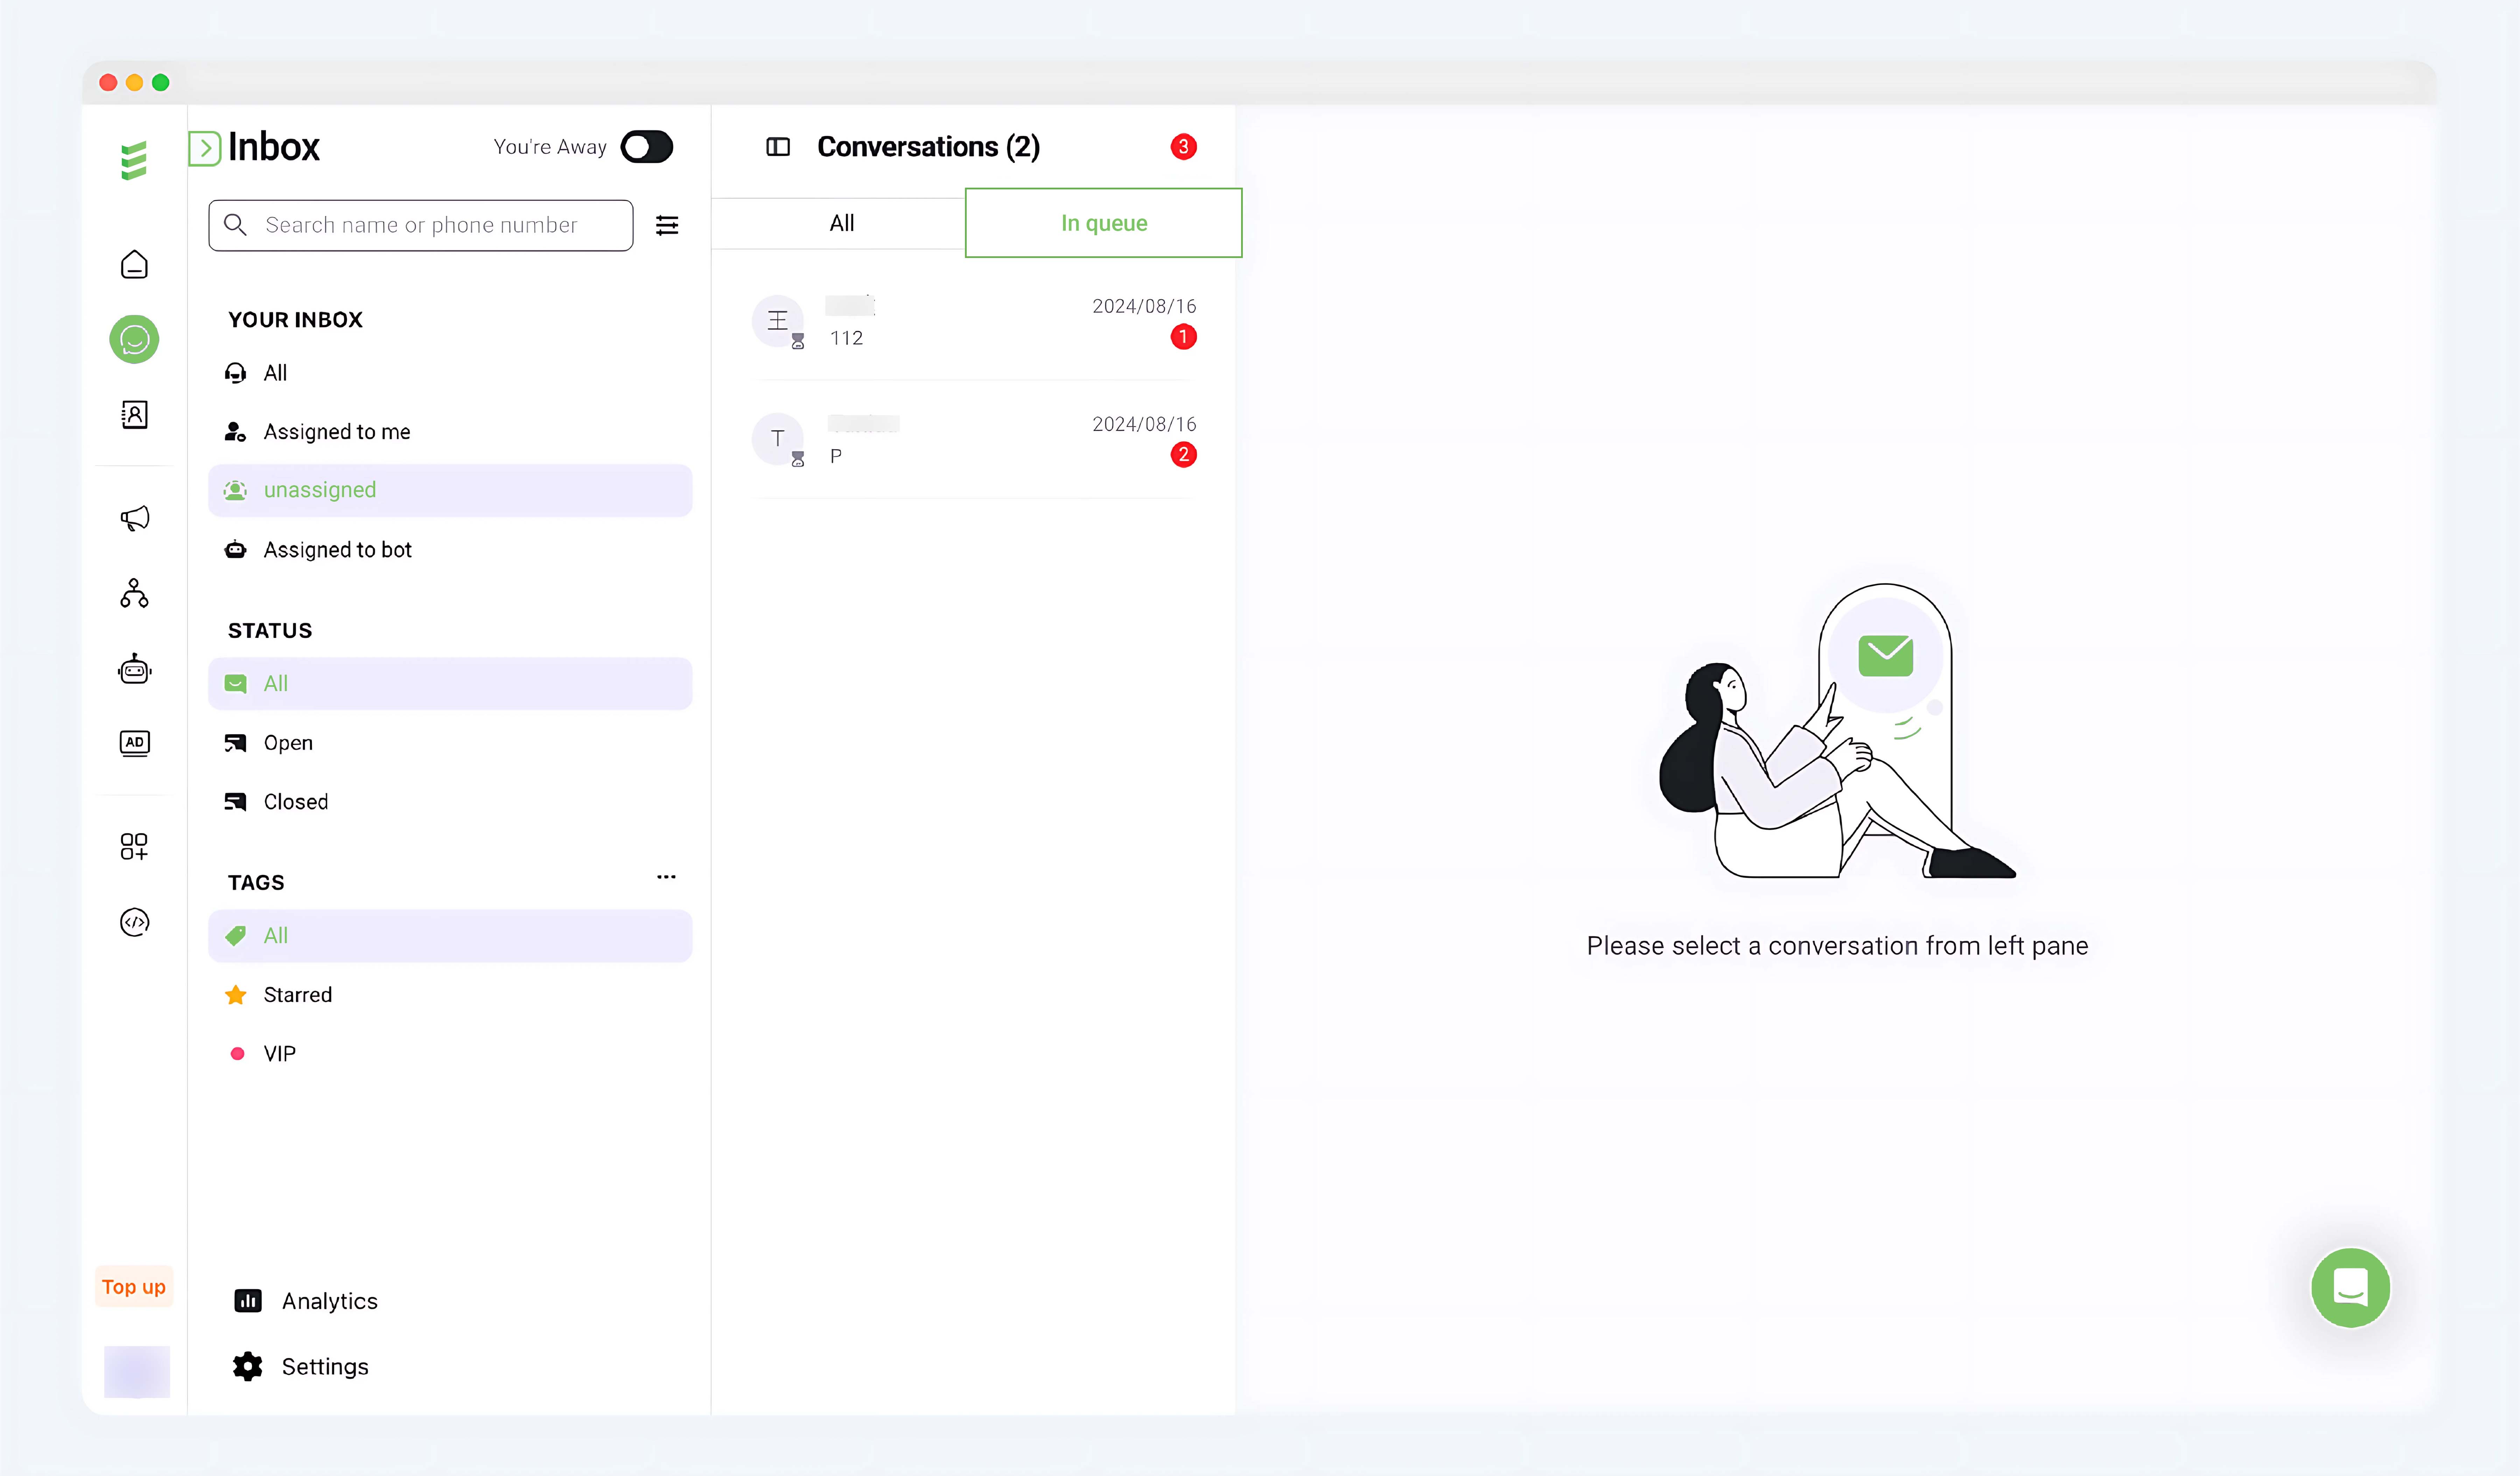
Inbox > Unassigned > In queue
You can view the conversations currently in the queue. Click into a conversation to transfer it.
Auto-reply for delayed agent responses
If the customer's message is not replied to by the agents within the specified time, the system will automatically send a message to the customer. You can set the waiting time for sending reminder messages.
Steps
Step 1: Turn on the switch
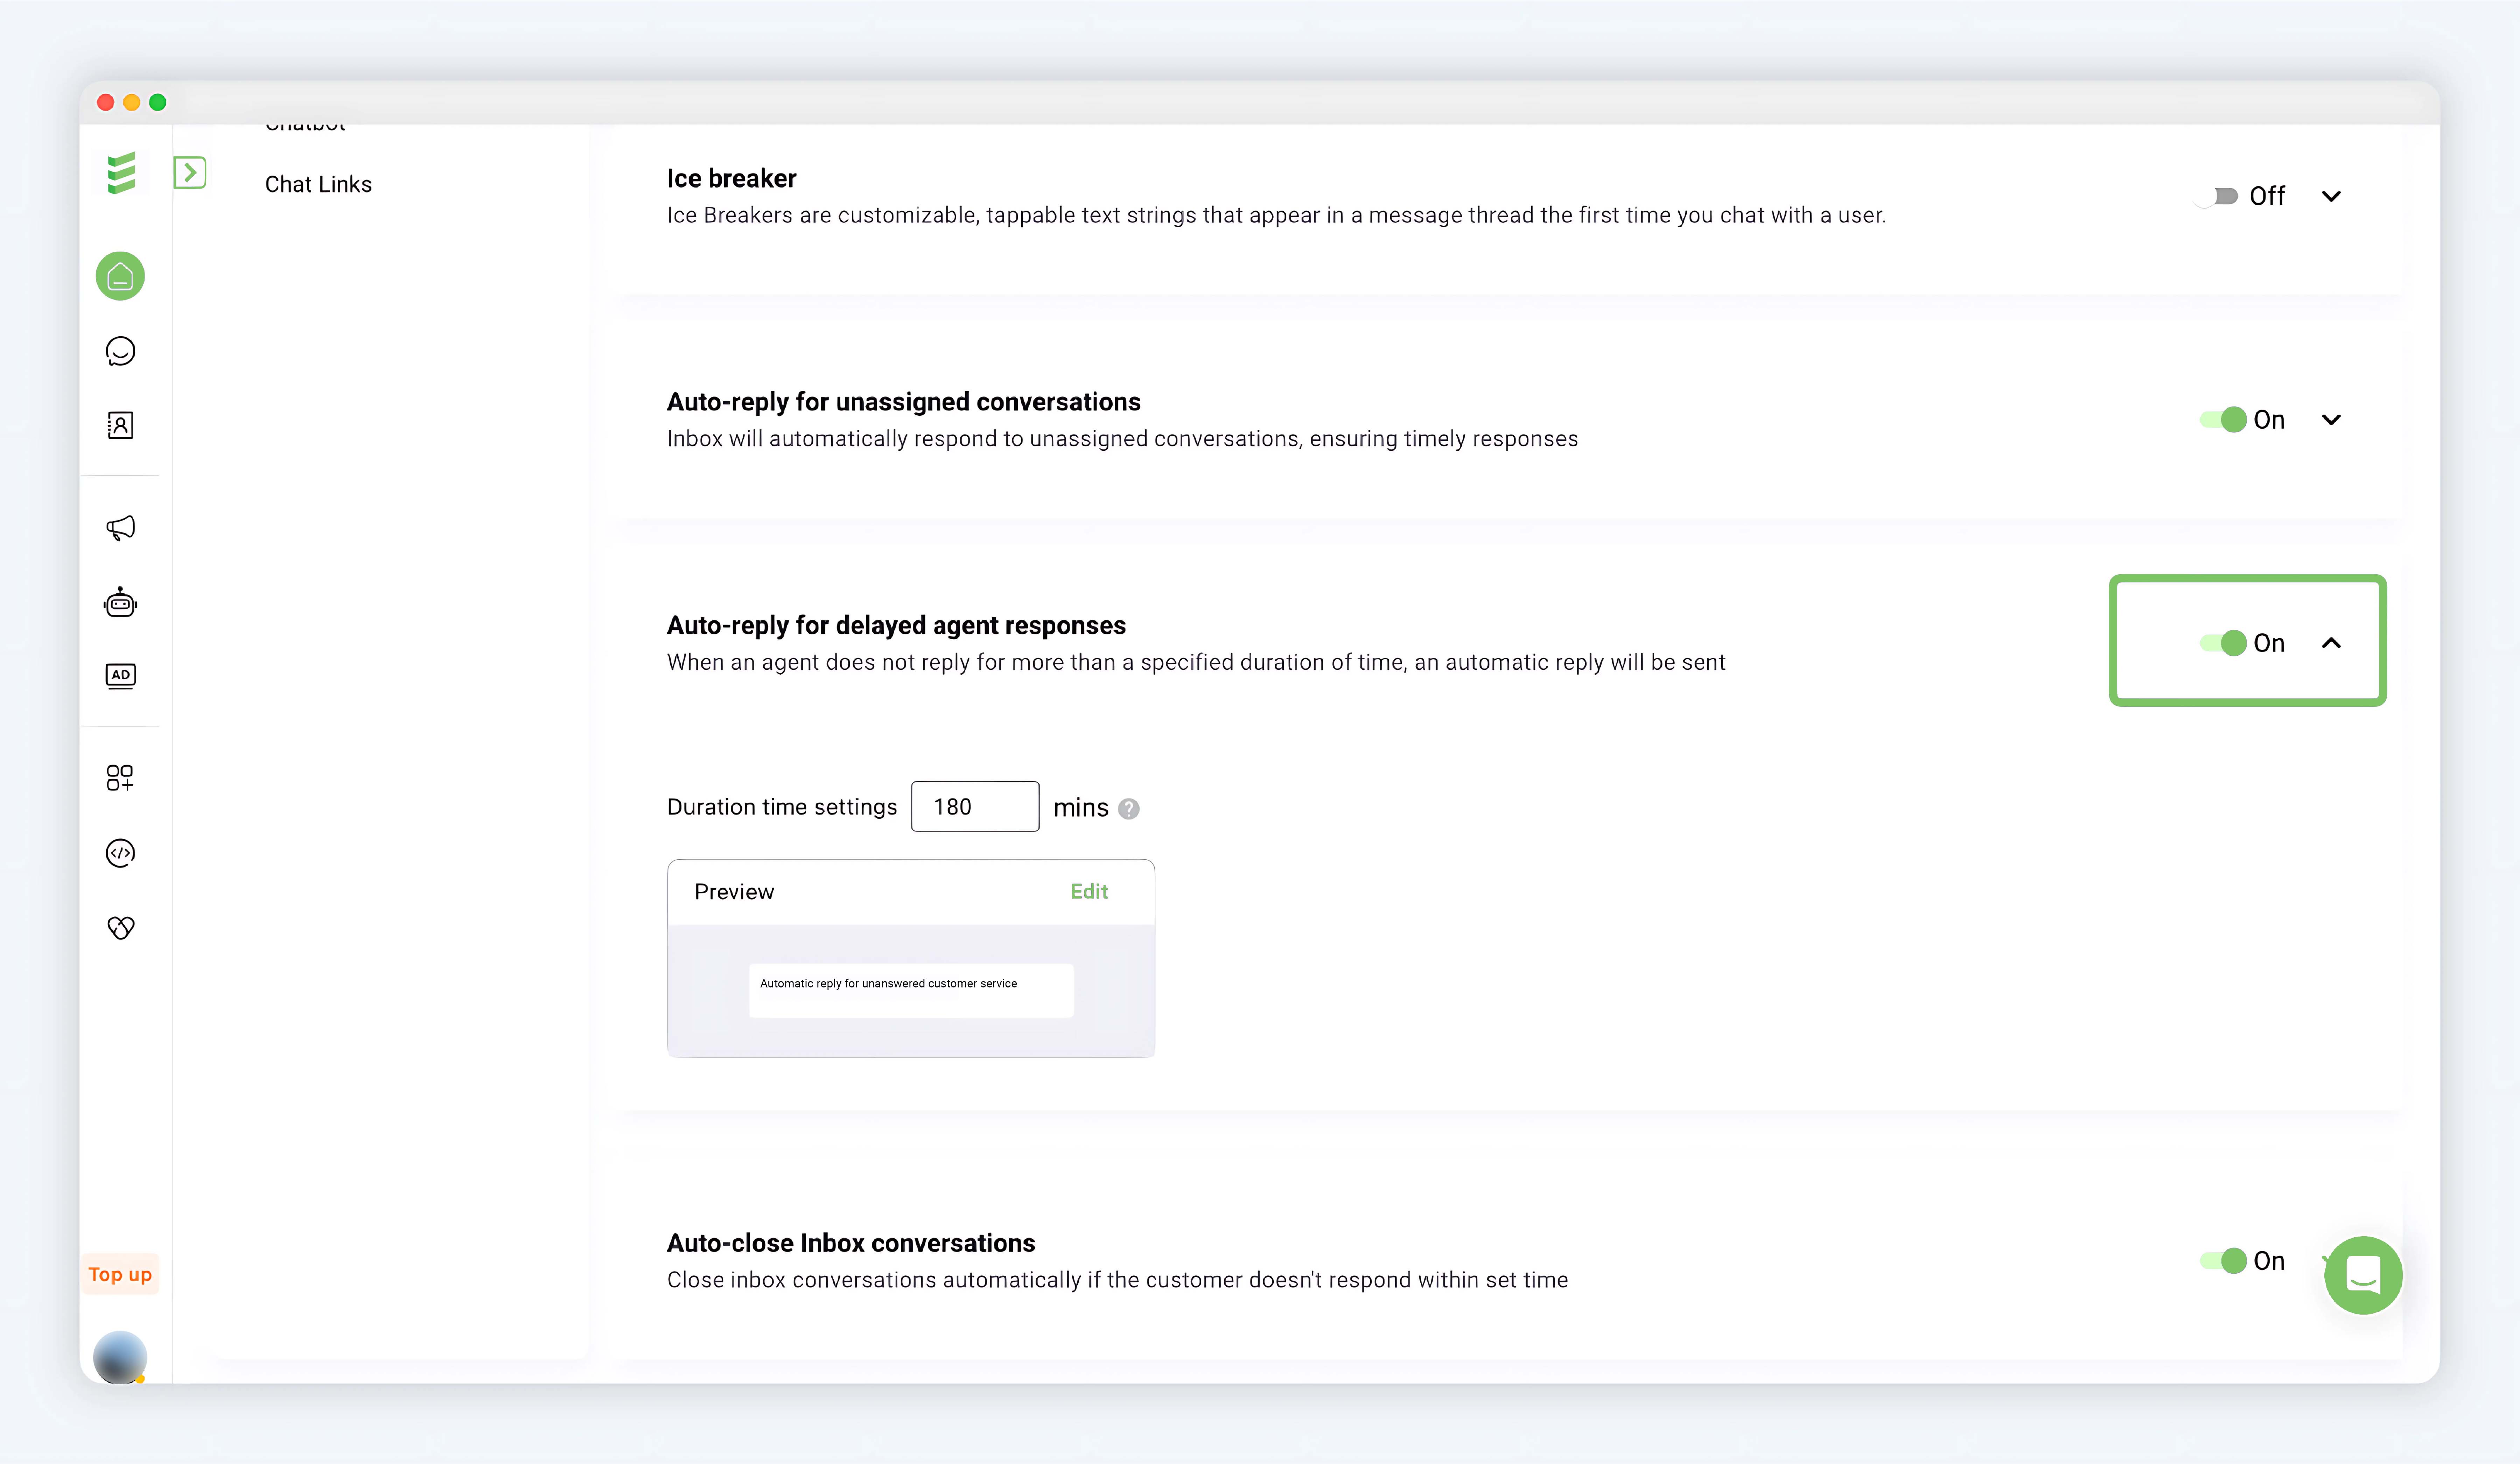
Enable Auto-reply for delayed agent responses
Step 2: Set the waiting time and reply content
Waiting time: If the agent has not replied to the customer within the set time, the system will automatically reply.
Click the Edit button to edit the content. Supported message types:
-
Text message: Pure text type message. Supports Emoji, bold, italic, etc.
-
Rich media message: Image/video/file + text type message.
-
Interactive message: Interactive messages with buttons, such as quick reply buttons, view website buttons, list buttons.
After setting, click Save.
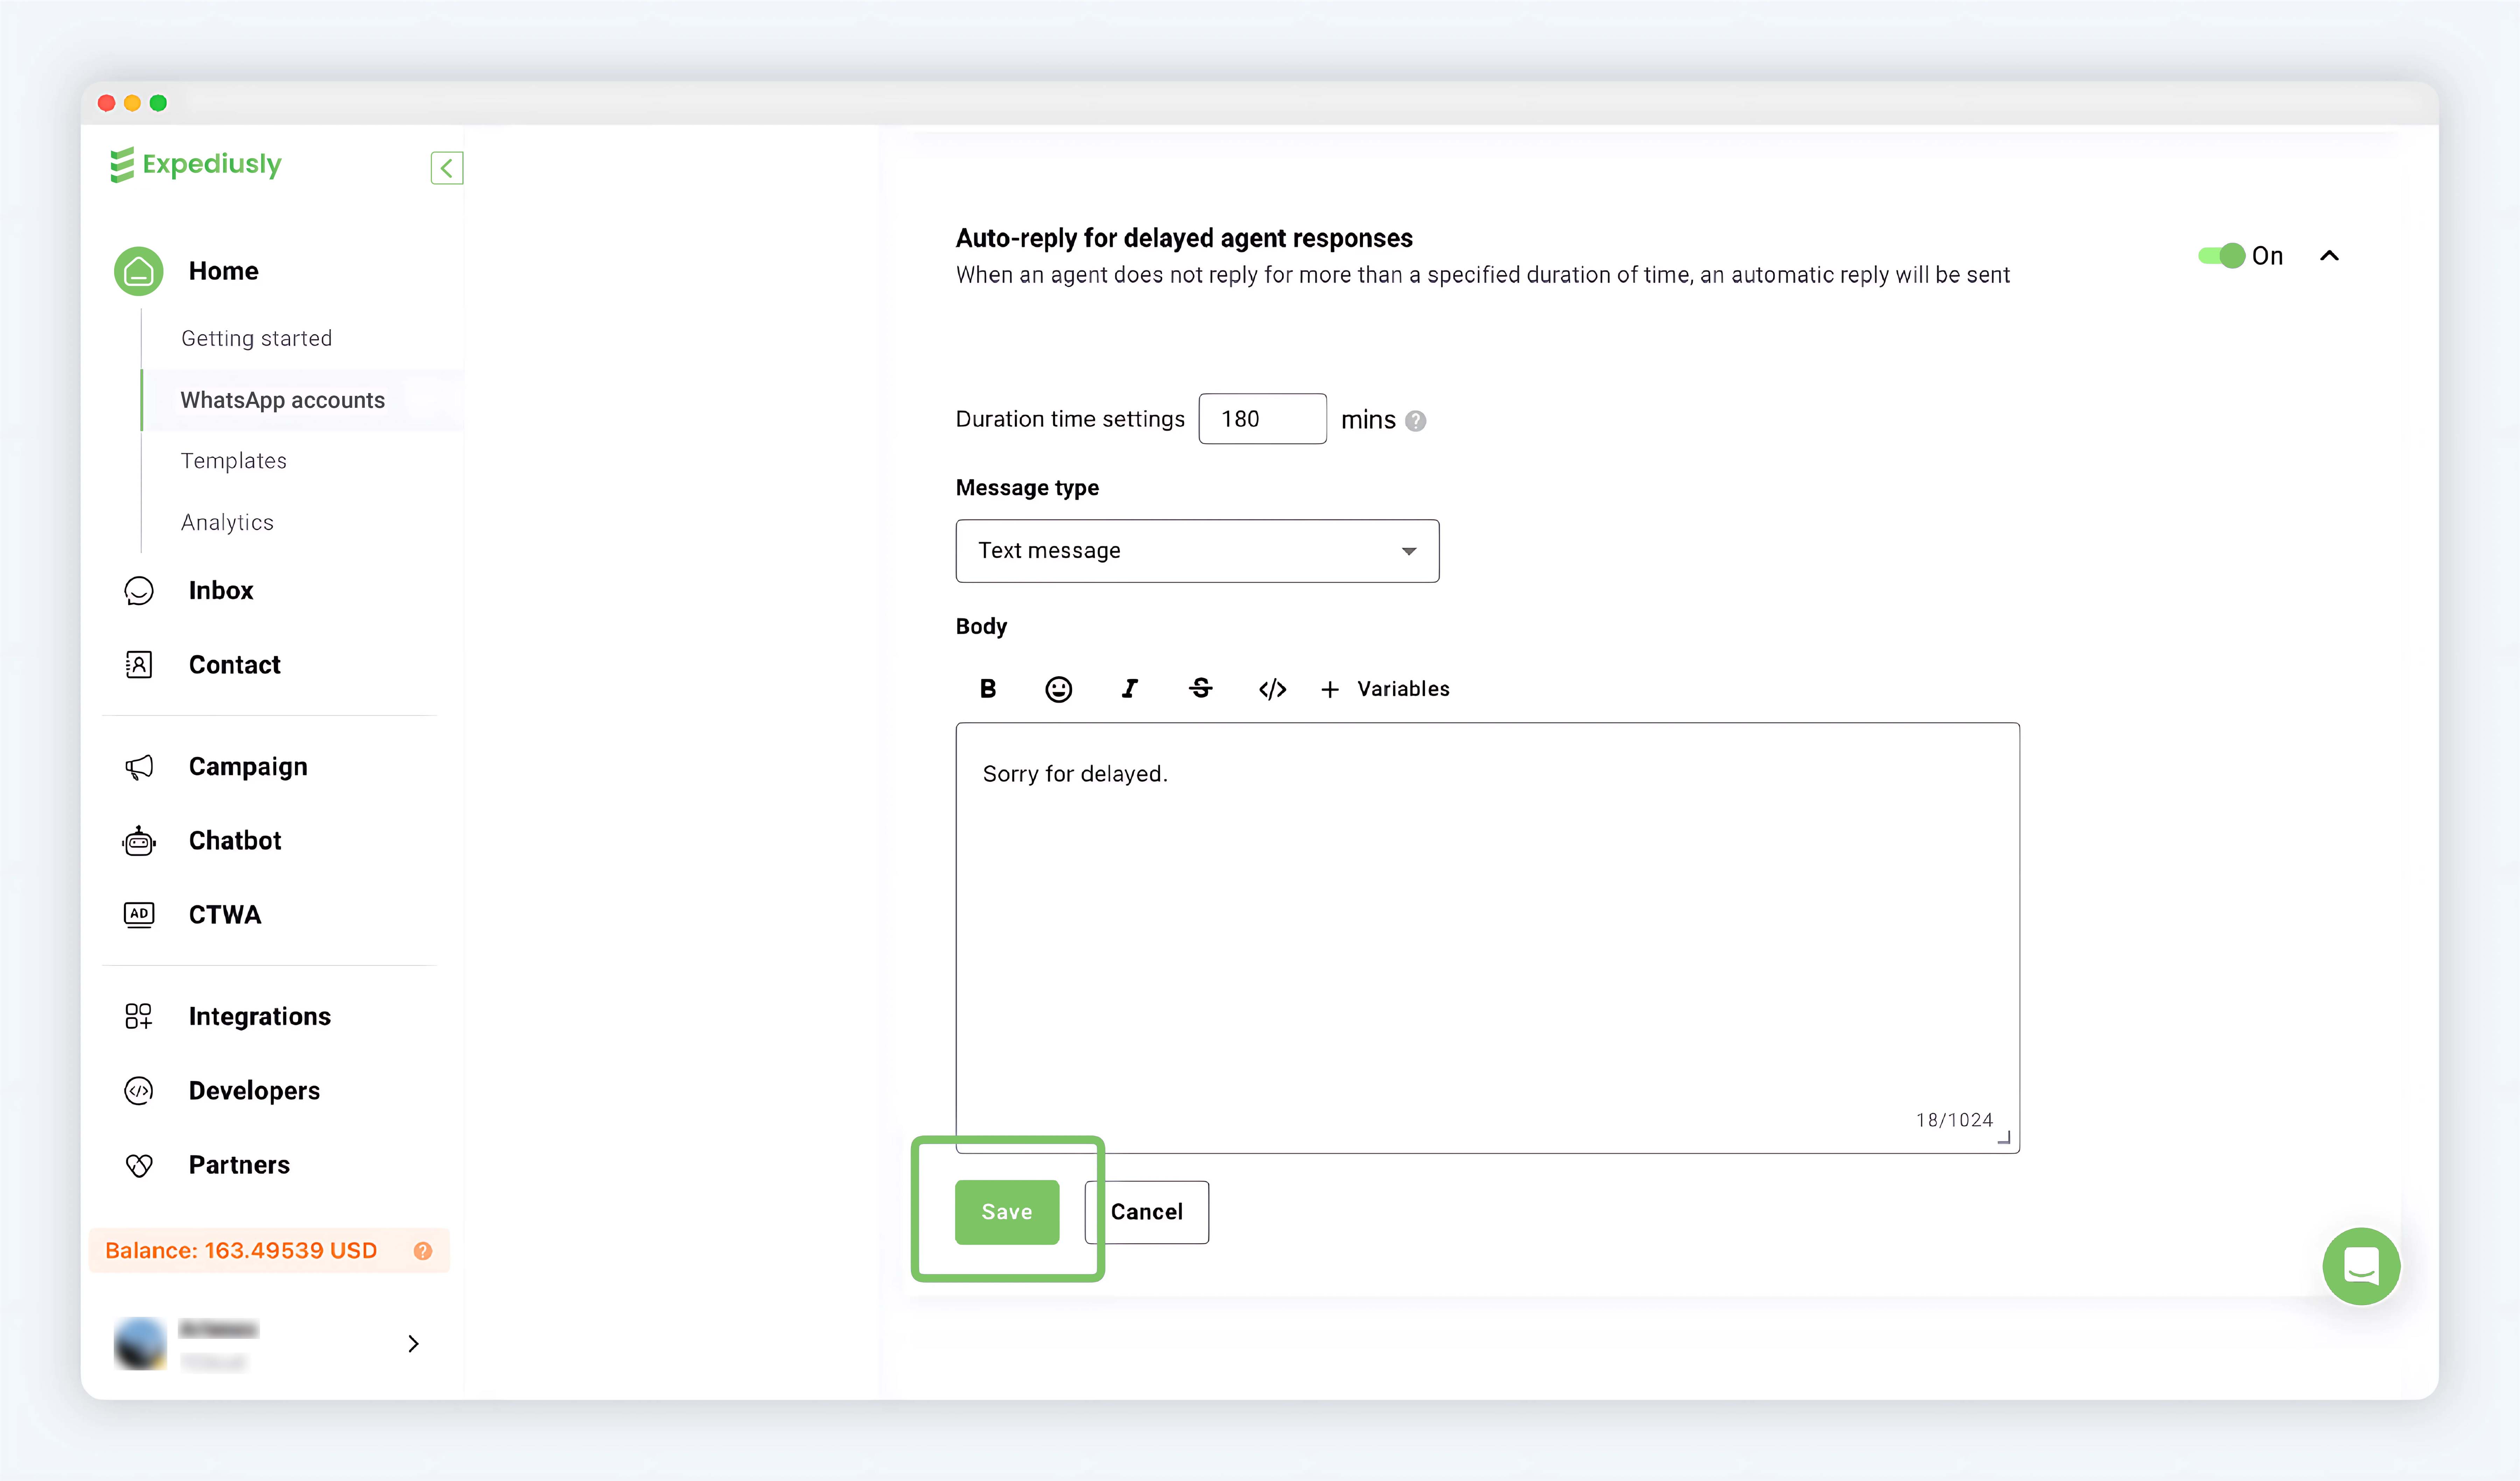
Edit and save Auto-reply for delayed agent responses
Auto-close Inbox conversations
In the case of agent is serving the conversation, if the customer does not reply within the set time, the system will automatically close the conversation. You can set the auto-close time.
This setting does not apply to unassigned conversations and conversations assigned to bots. Unassigned conversations will not be automatically closed, and conversations assigned to bots have two closing methods:
-
Close the conversation after the process is completed.
-
Close the conversation if the customer does not respond to the bot for 10 minutes.
Steps
Step 1: Turn on the switch
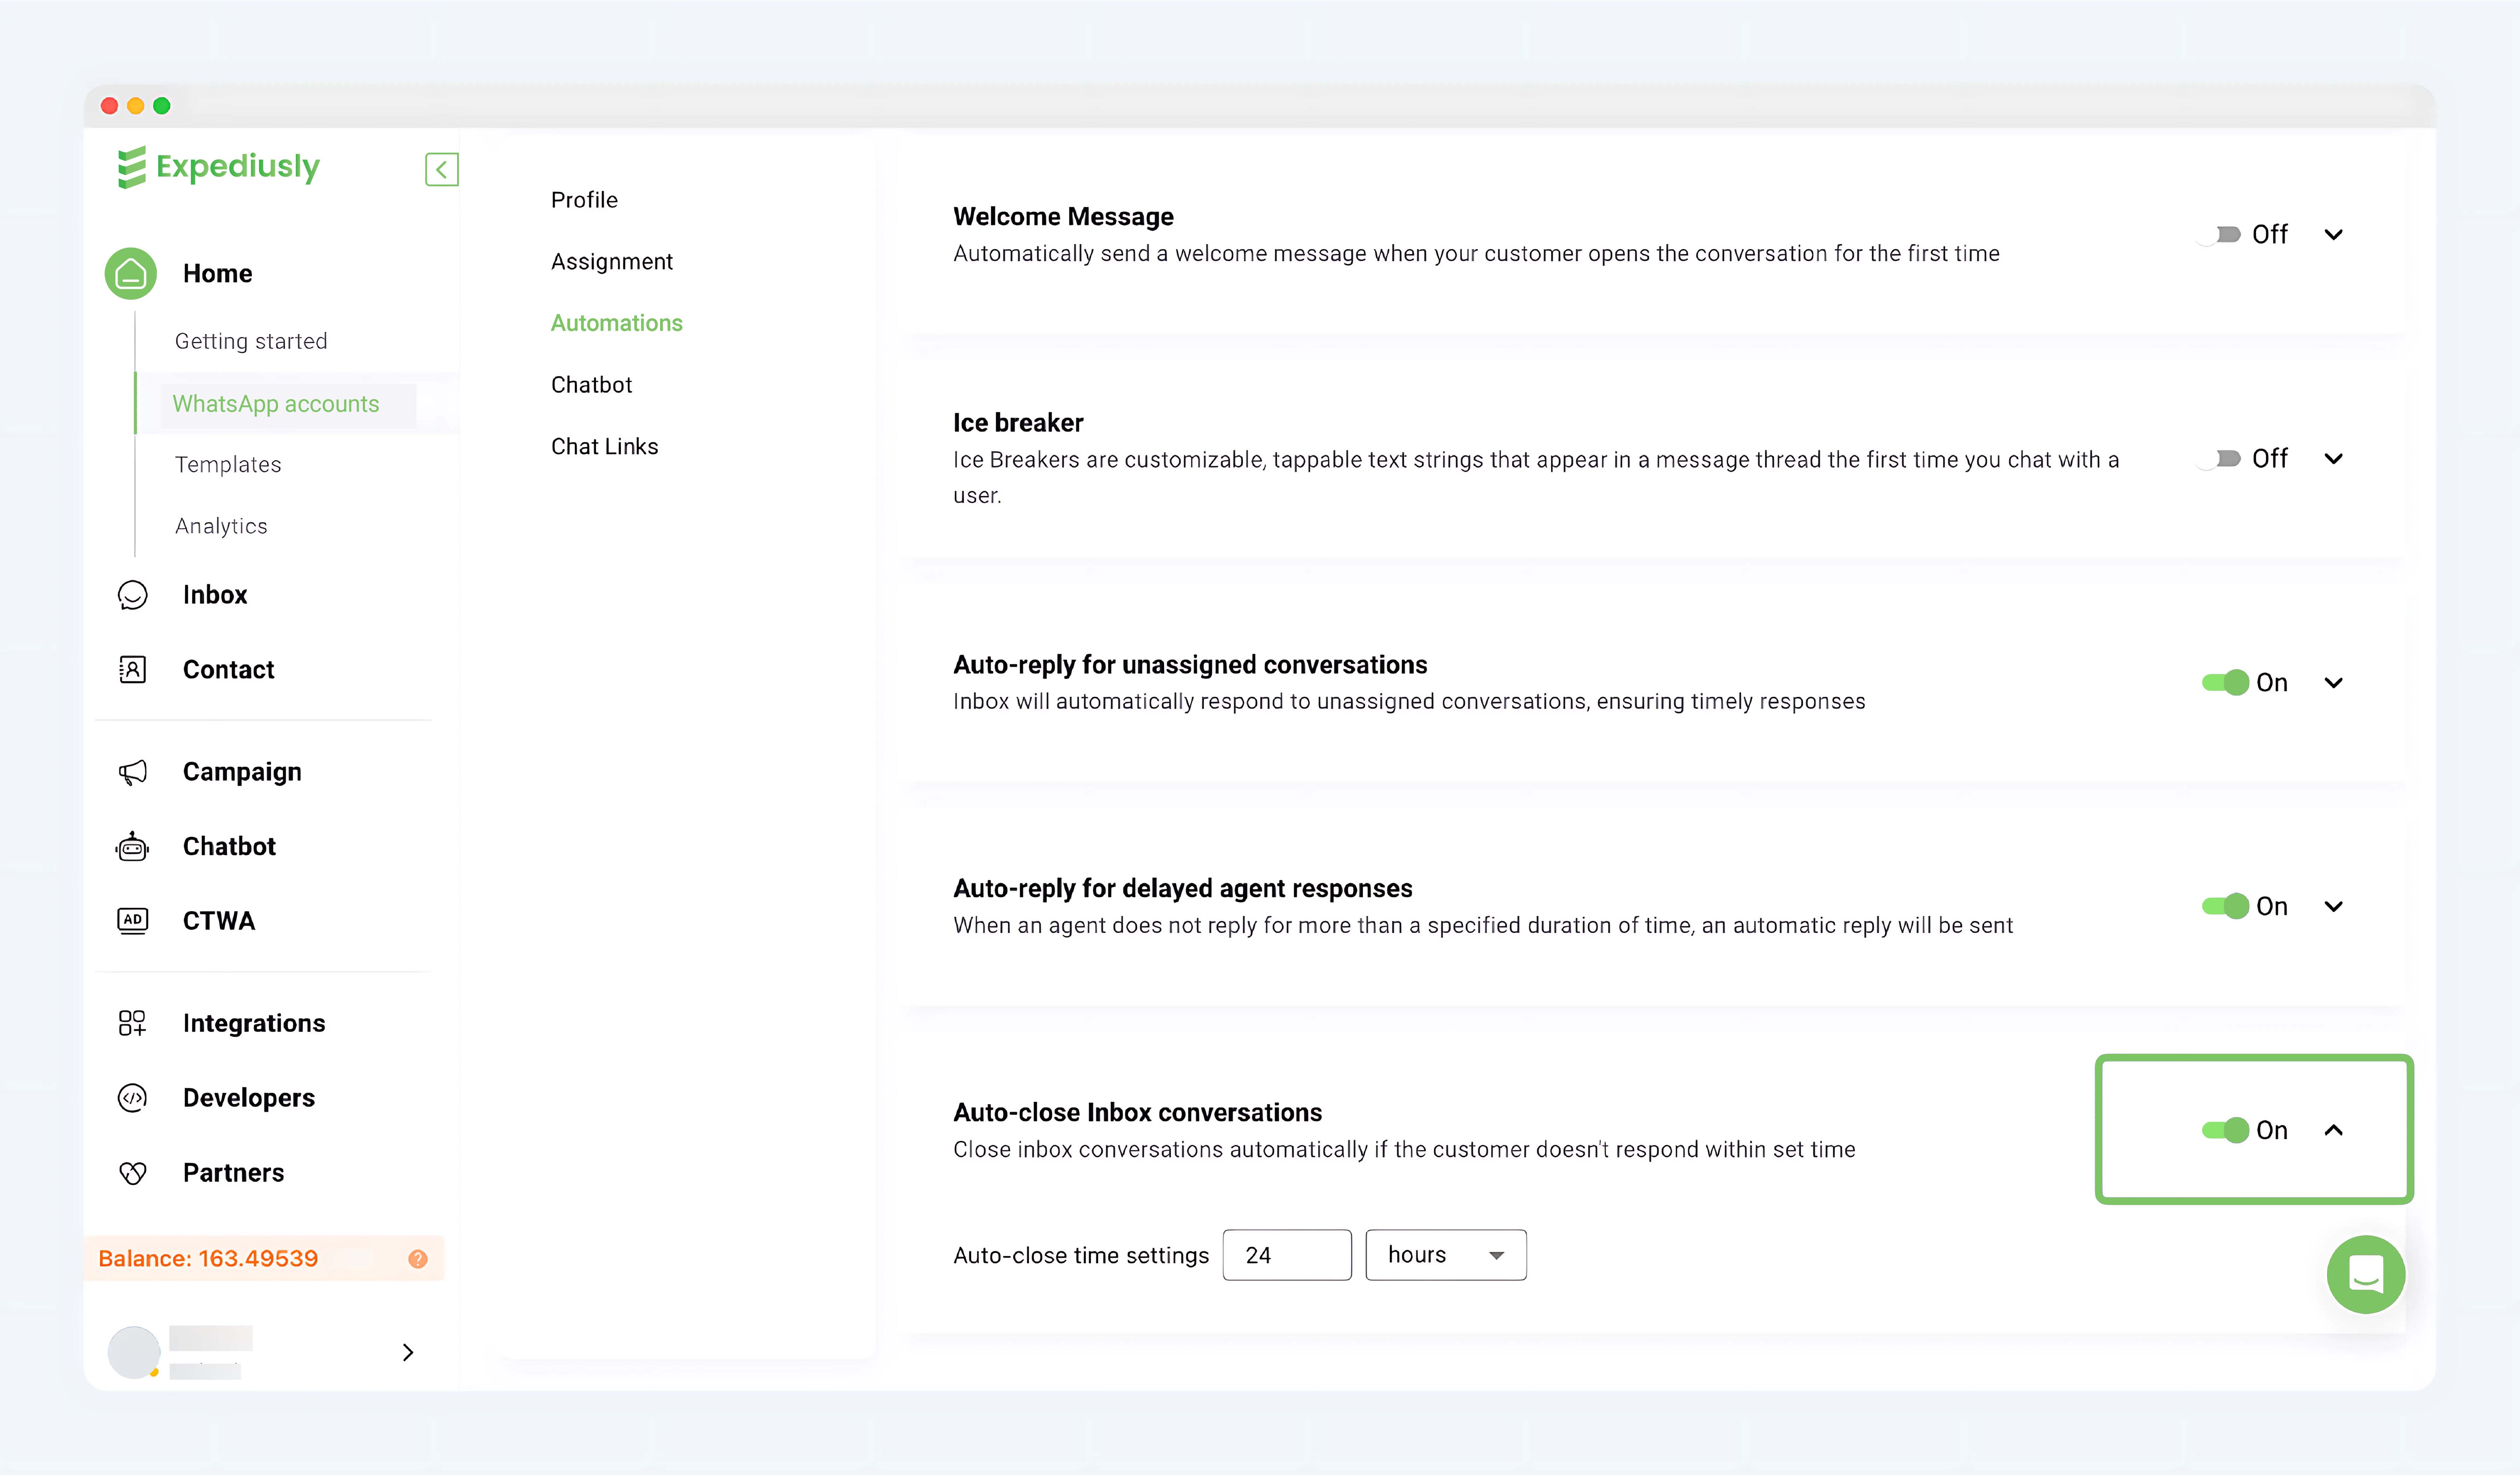
Enable auto-close Inbox conversation
Step 2: Edit the auto-close time
Supported configuration range: 1 minute to 72 hours.
Recommended configuration parameter: 24 hours.
After configuration, click Save.
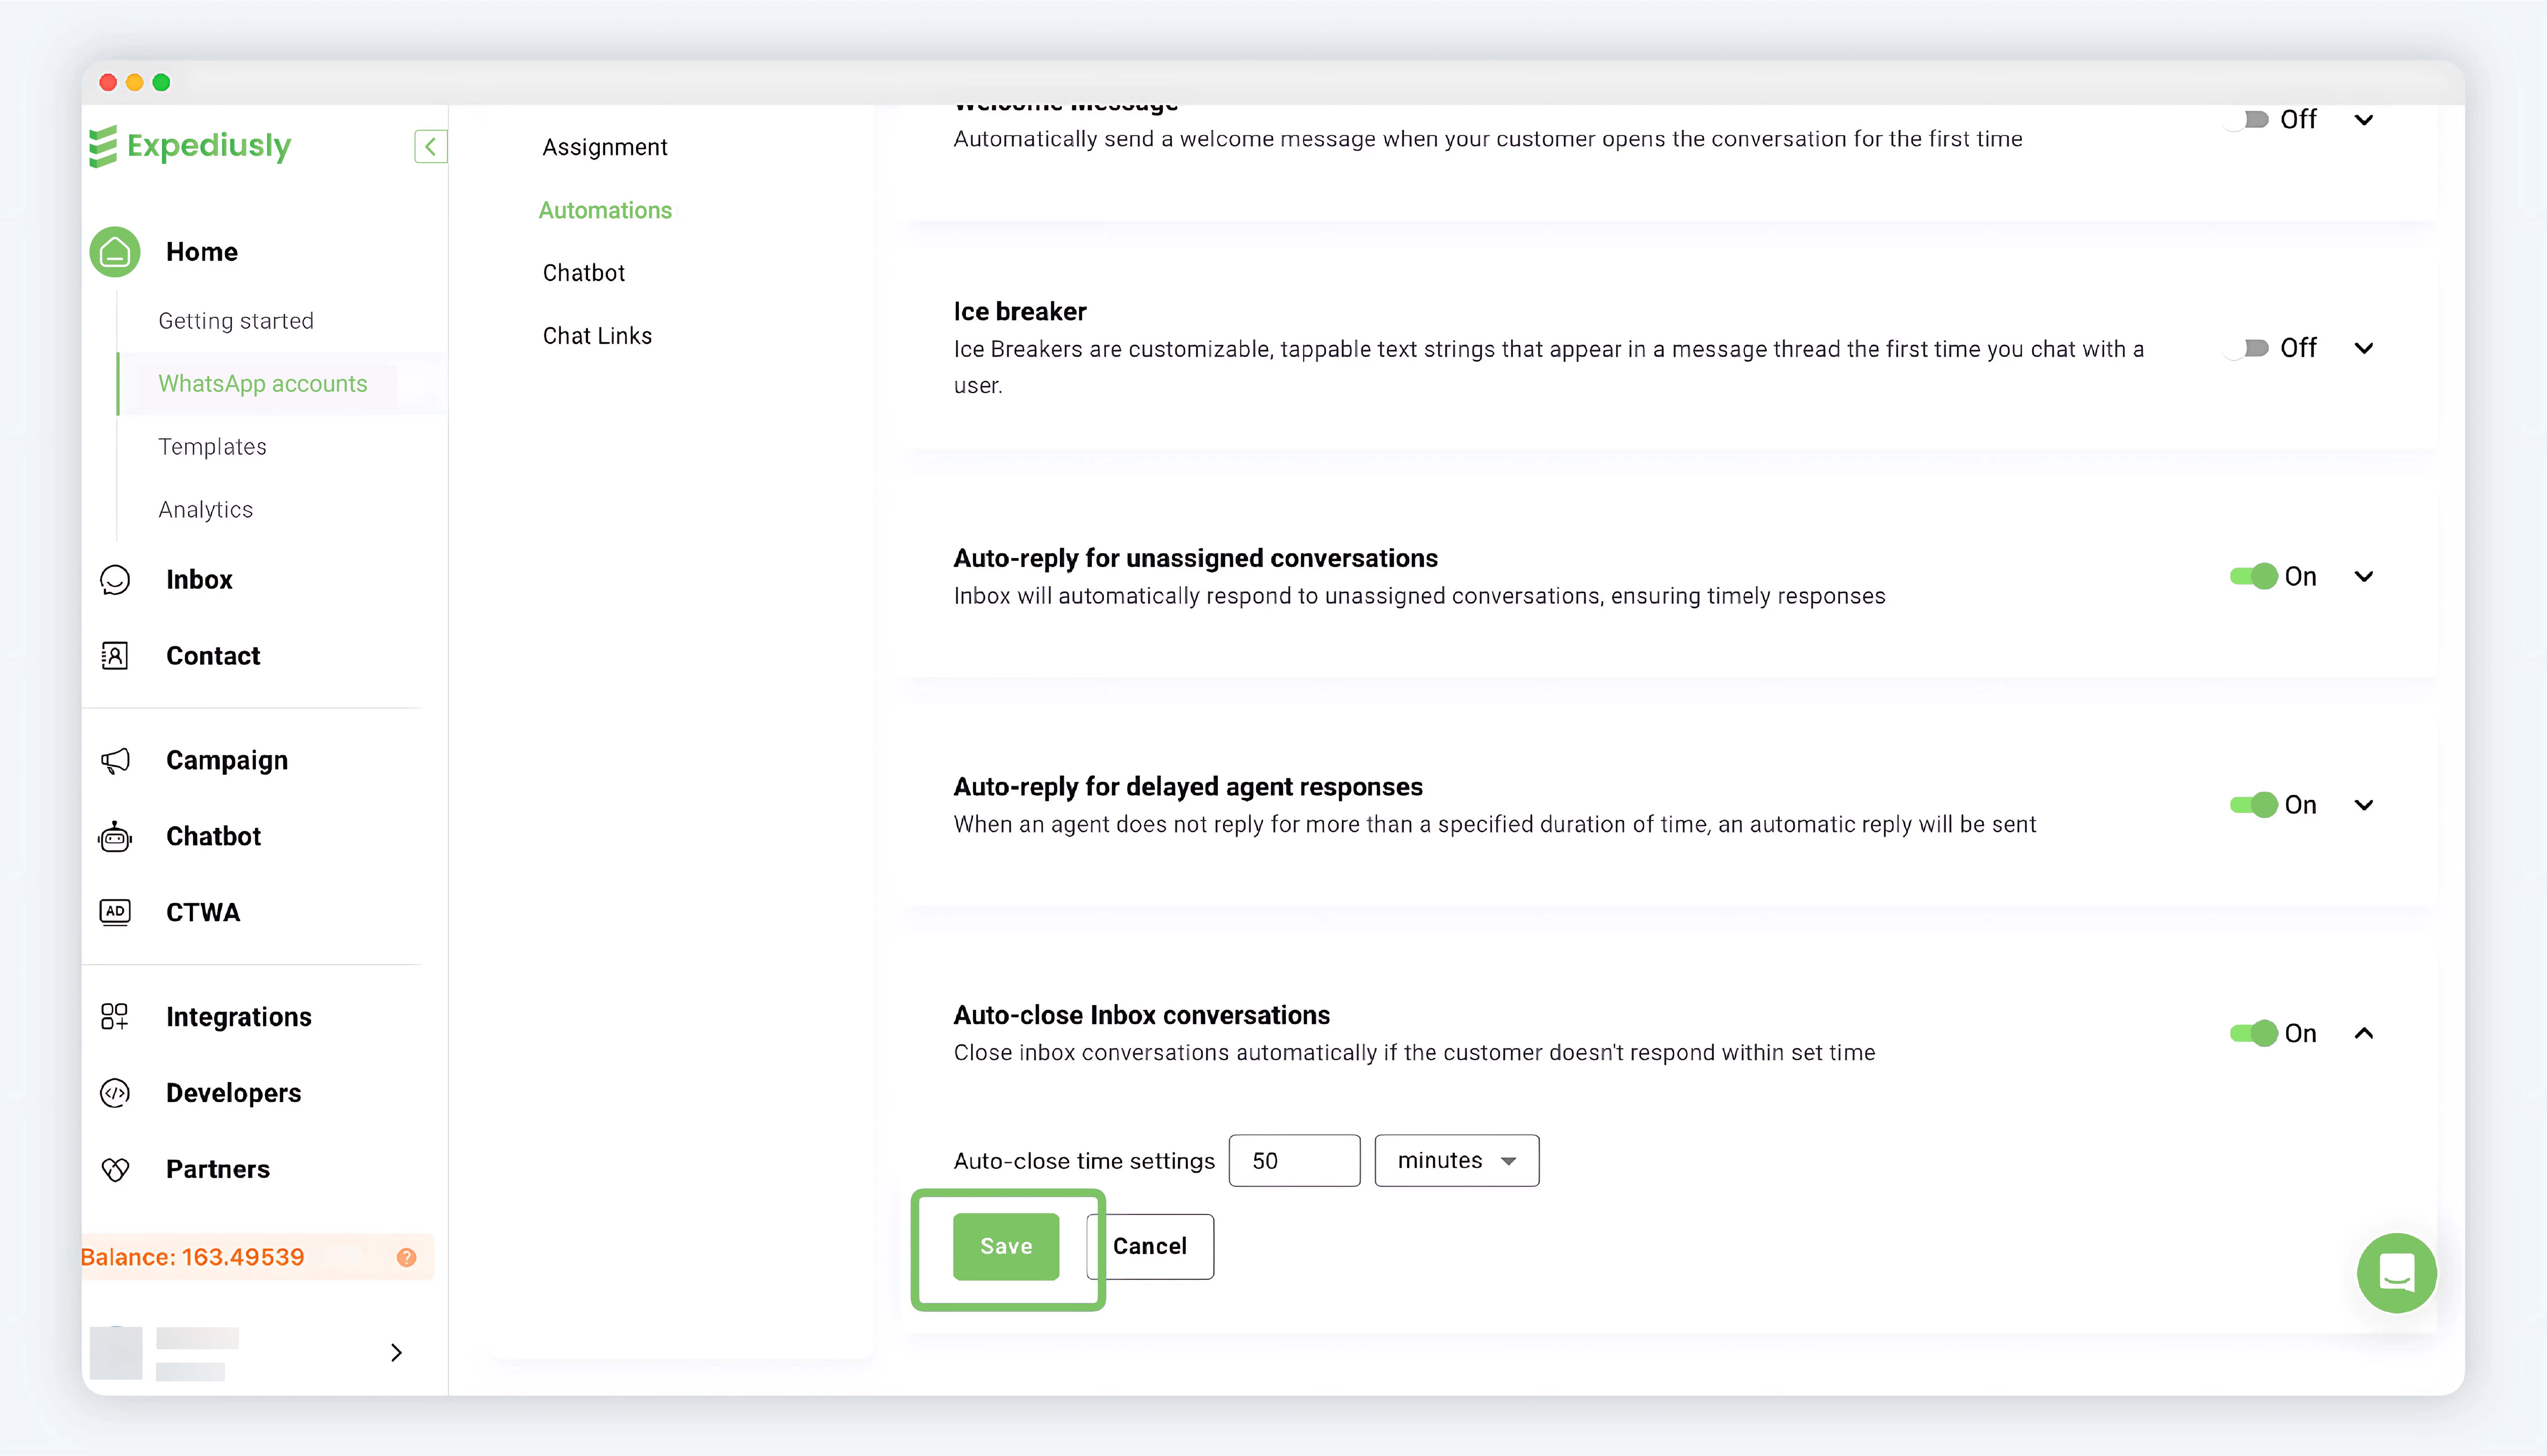
Save auto-close Inbox conversations
CSAT(Customer Satisfaction)
When this switch is turned on, after a conversation handled by a human agent ends, a satisfaction survey will automatically be sent to the user. Please note that if the conversation is handled by a BOT, the satisfaction survey will not be triggered. This feature is only effective for conversations handled by human agents.
Steps
Step 1: Turn on the switch
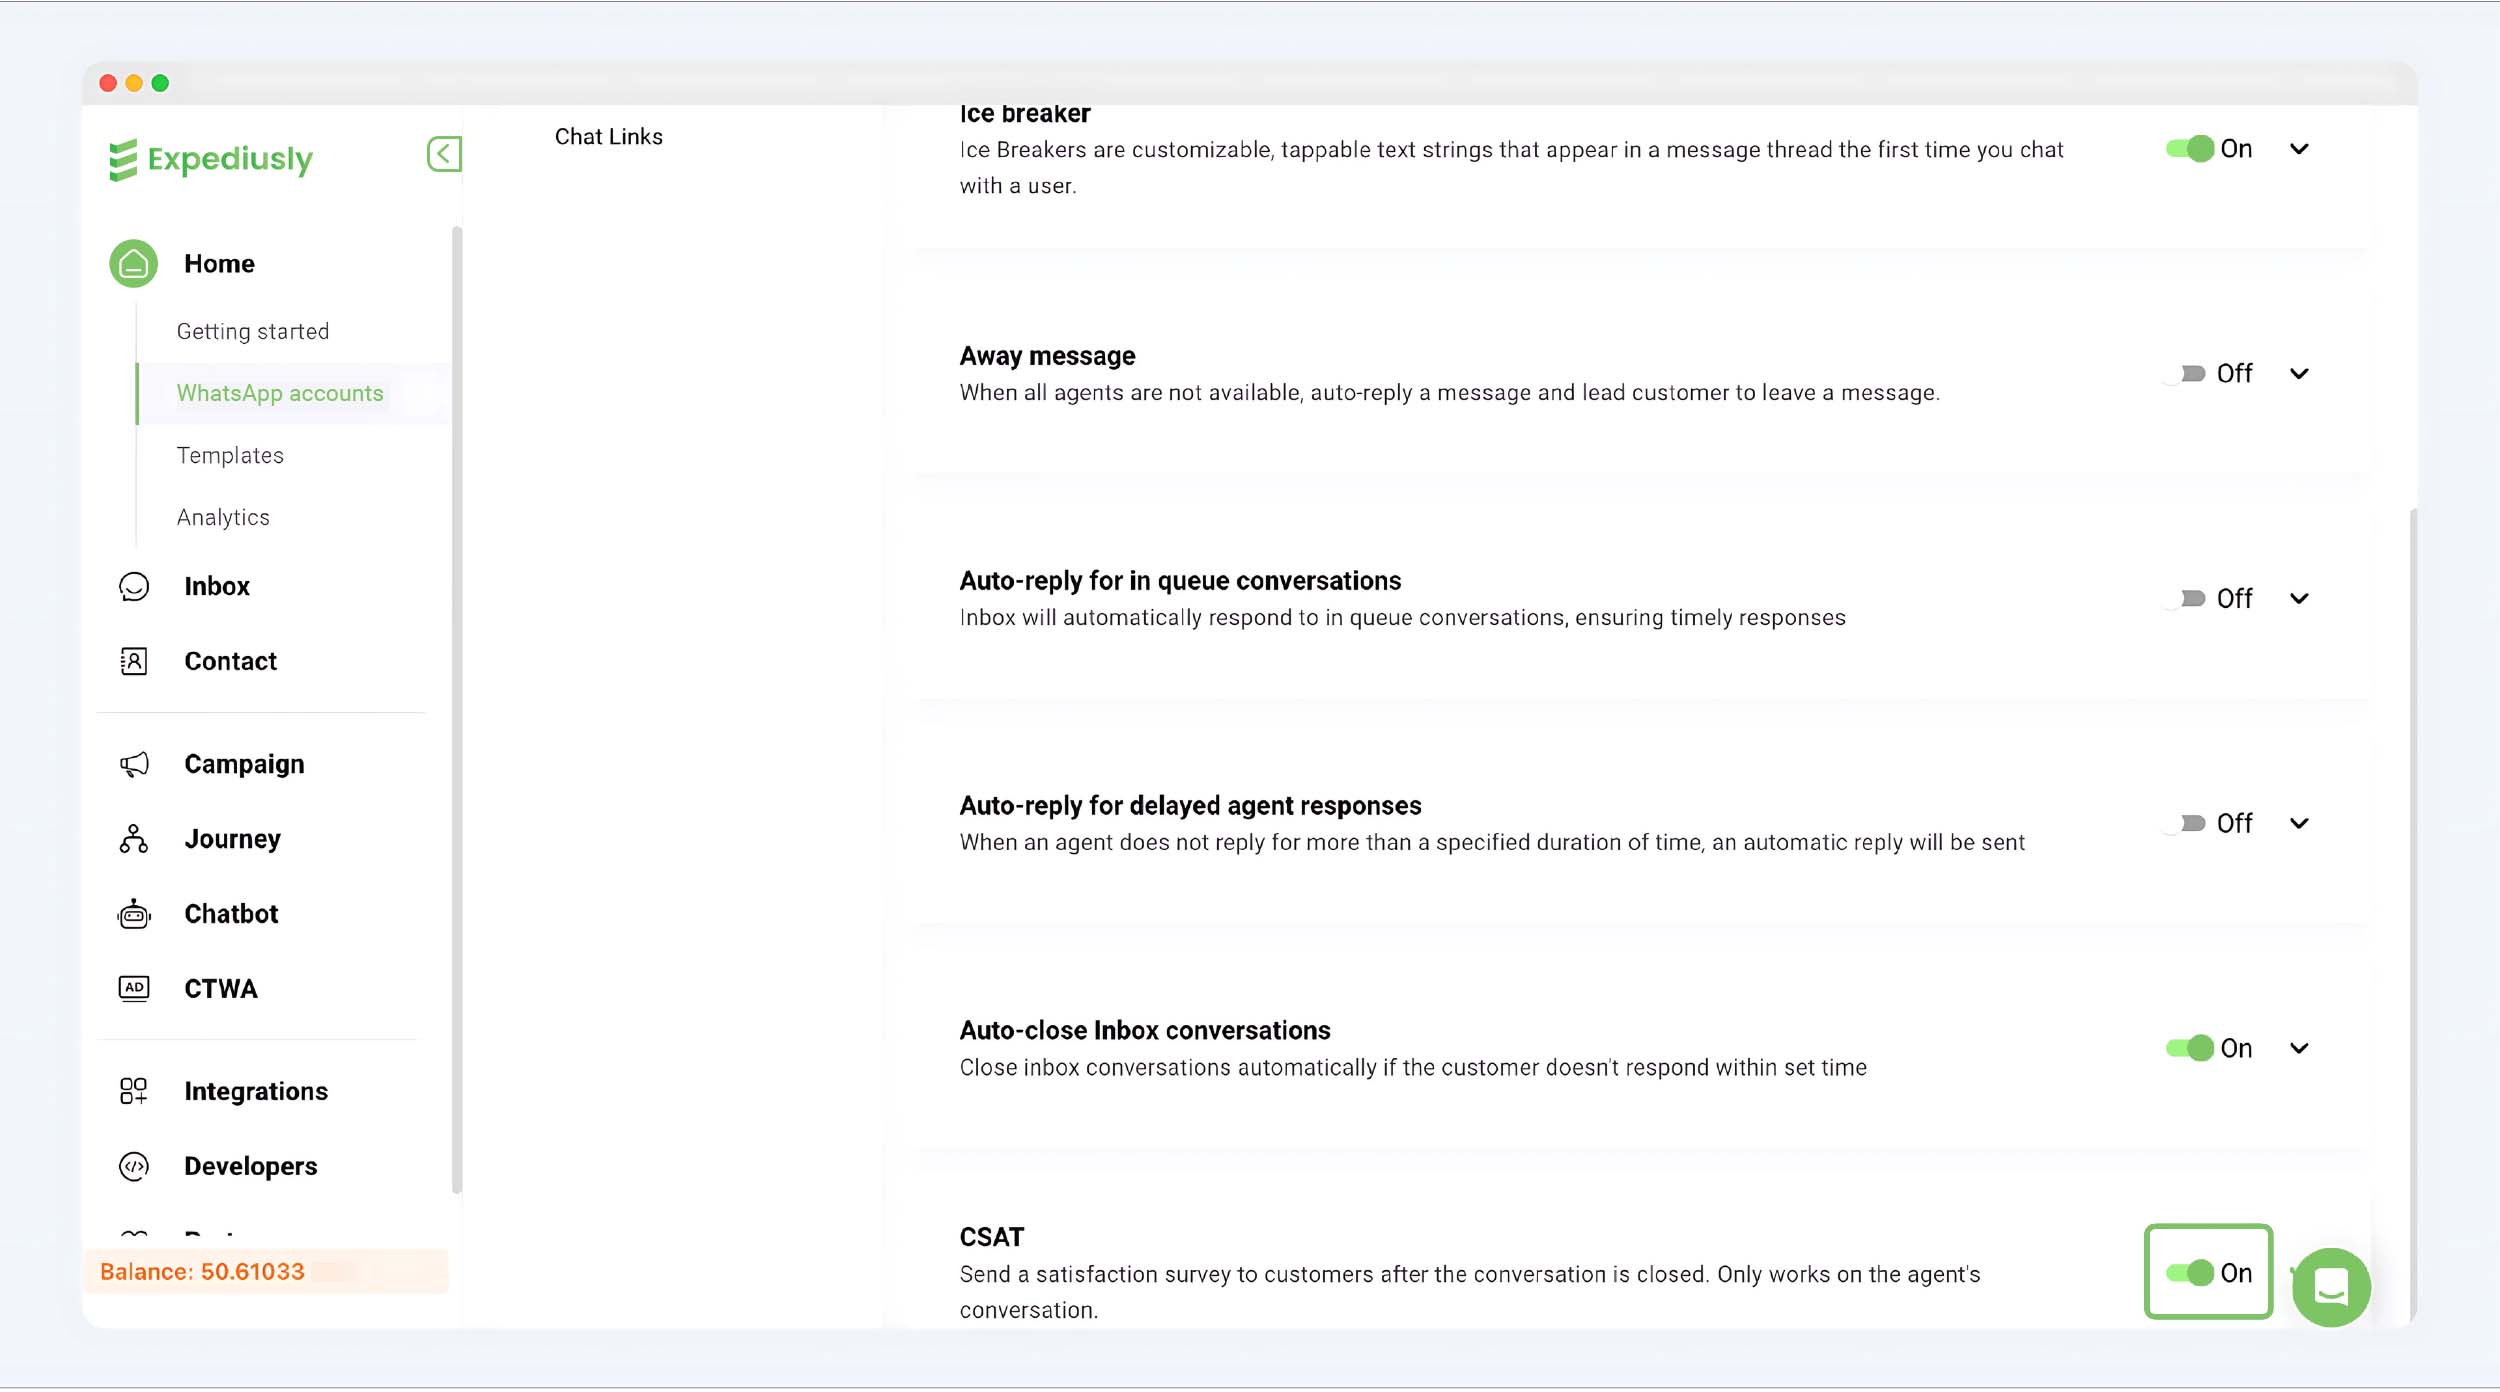
Step 2: Edit the Content
As shown in the image below, you can configure the text for the message and the button. Once the button is expanded, the survey format is fixed and cannot be modified.